
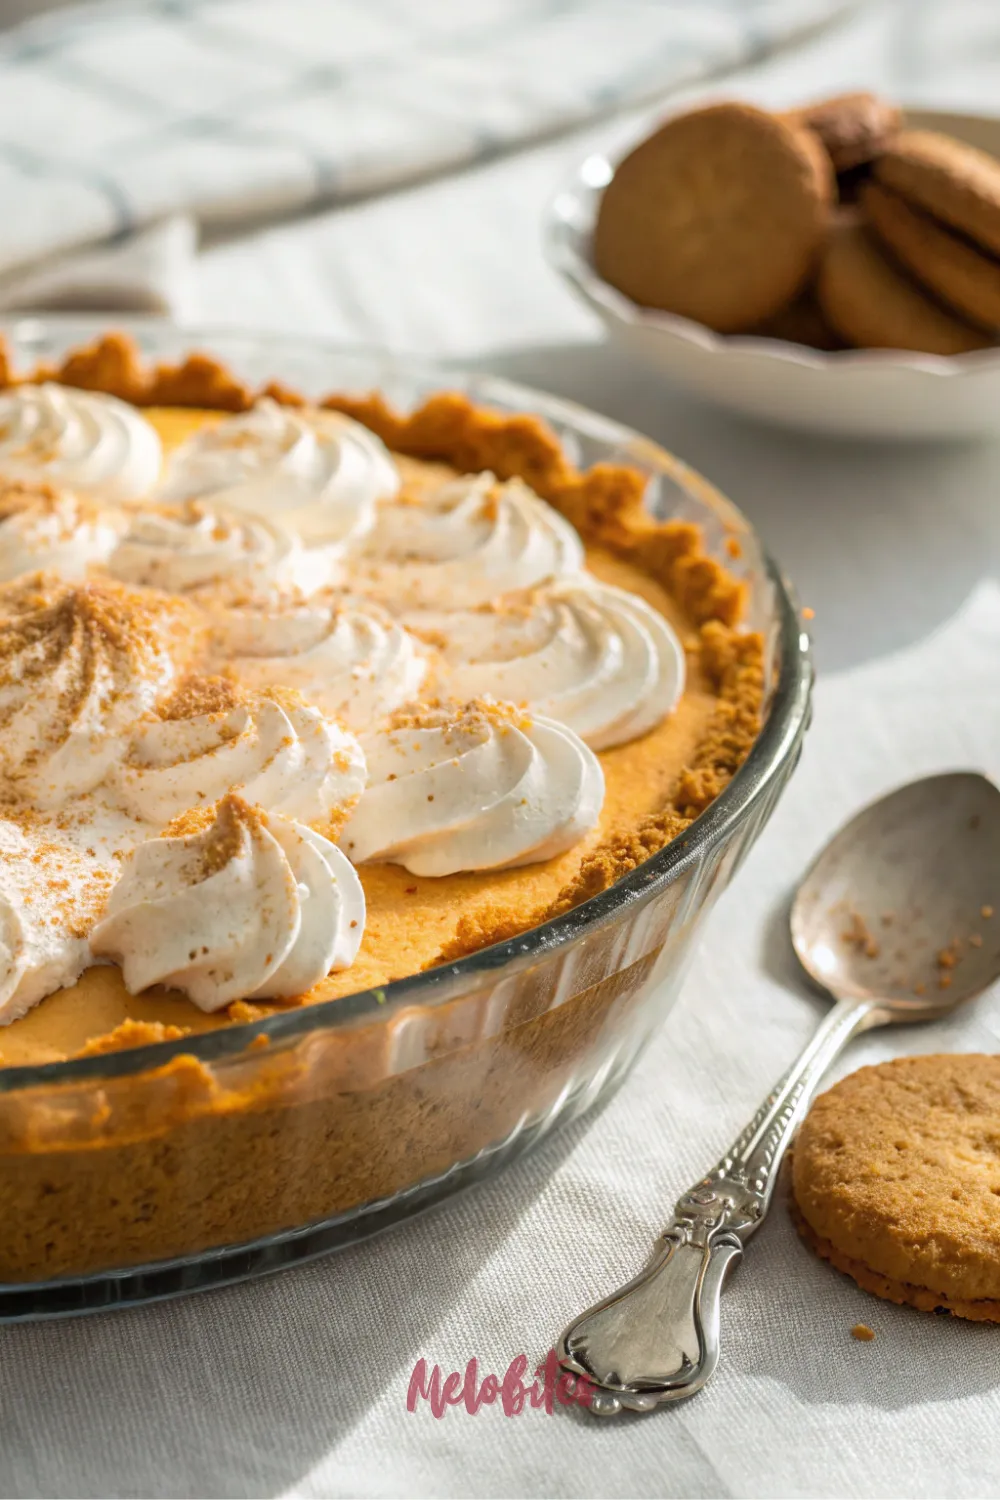
Hello, fellow dessert lovers! Let’s paint a picture of Thanksgiving, shall we? The turkey is taking up all the real estate in the oven. The casseroles are in a holding pattern, waiting for their turn.
The house smells incredible, but you’re stressed. Why? Because you still have to bake the most important part of the meal: the pumpkin pie.
What if I told you there’s a better way? What if you could make the most amazing, light, and airy pumpkin pie without ever turning the oven on? Welcome to your new holiday secret weapon: this unbelievably simple No-Bake Pumpkin Chiffon Pie with a spicy gingersnap crust.
Why This is the Easy Pumpkin Pie Recipe You Need
I call this my “lifesaver pie,” and I mean it. This is the easy pumpkin pie recipe simple enough for a total beginner but impressive enough for a holiday centerpiece.
We’re not making a dense, heavy, baked custard. We are making a chiffon, which is just a fancy word for a filling that’s impossibly light and mousse-like. It’s the perfect, refreshing end to a very heavy and rich meal.
The Magic of a No-Bake Pumpkin Pie
The biggest selling point is right in the name: no-bake. Do you know what that means? It means your oven is completely free for the turkey, the stuffing, and the green bean casserole.
This is one of those Thanksgiving desserts that you can make a full day ahead of time. It actually gets better as it sits in the fridge, letting the flavors meld. This isn’t just a dessert; it’s a brilliant time management strategy for your fall gathering.
What Makes This Pumpkin Chiffon Pie with Gingersnap Crust Special?
There are two things that make this pie a true showstopper. First, the filling. It’s not a dense, wet custard; it’s a “chiffon,” which is like a pumpkin-spice cloud.
Second, that crust! We’re ditching the traditional (and often soggy) pastry for a spicy, crunchy, and buttery gingersnap crust. That pop of ginger and spice is the absolute perfect partner for the creamy, cool pumpkin filling.
Why You’ll Love This No-Bake Pumpkin Pie
- No Oven Required: I can’t say this enough. It saves you so much stress and oven space on a busy holiday.
- Unbelievably Light: This pie is airy and mousse-like, not heavy. It’s the perfect, light dessert to have after a big meal.
- The Perfect Make-Ahead: This pie must be made ahead, so it’s one less thing to do on the day of your party.
- Packed with Flavor: The spicy gingersnap crust and the warmly spiced filling are a match made in fall heaven.
- It’s (Almost) Foolproof: If you can follow a few simple steps, you can make this pie. No pastry skills needed!
Nutritional Benefits
Let’s be real, this is a holiday dessert, and it’s meant to be an indulgence. But we can still feel good about the ingredients! The pumpkin puree itself is a true superfood.
It’s absolutely loaded with Vitamin A (great for your eyes) and is a fantastic source of fiber. And since this pie is so light and airy, it feels much less heavy and rich than its traditional baked counterpart. It’s a smart choice for a balanced holiday plate.
Full Recipe: No-Bake Pumpkin Chiffon Pie
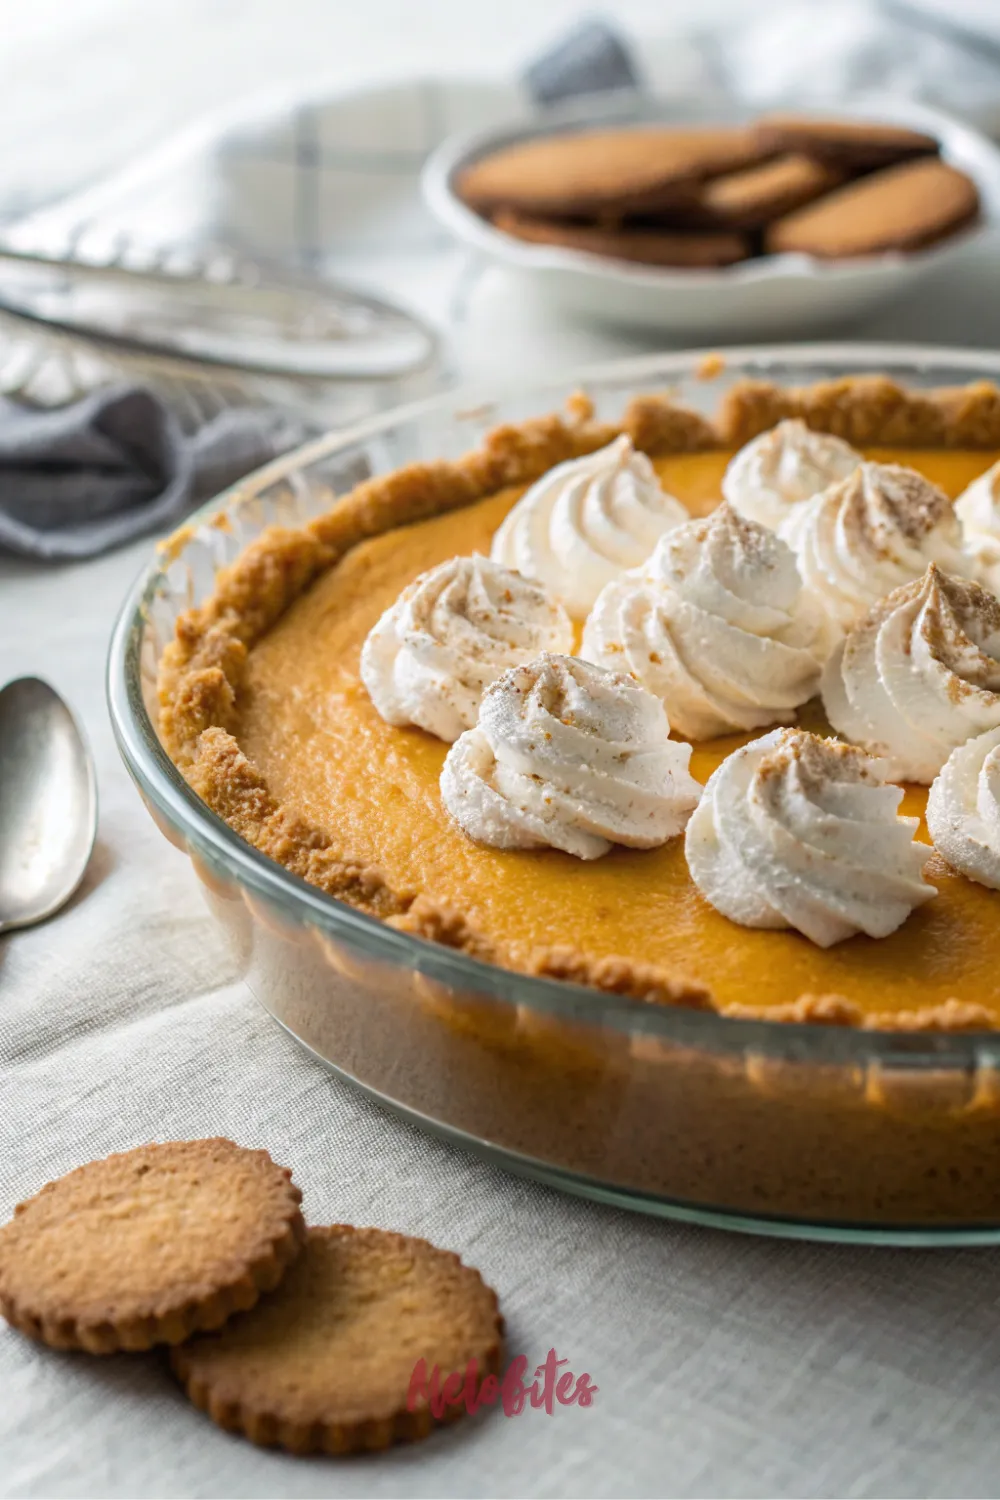
Prep Time: 30 minutes Cook Time: 5 minutes (for the stovetop) Chill Time: 6 hours Total Time: 6 hours 35 minutes Yield: 1 (9-inch) pie, 8-10 slices Category: Dessert Method: No-Bake Cuisine: American Diet: N/A
Essential Ingredients for this No-Bake Pumpkin Pie
For the Spicy Gingersnap Crust:
- 1 1/2 cups gingersnap cookie crumbs (about 7 ounces or 35-40 small cookies)
- 6 tablespoons unsalted butter, melted
- 2 tablespoons granulated sugar (optional, for a sweeter crust)
- 1/4 teaspoon kosher salt
For the Pumpkin Chiffon Filling:
- 1 envelope unflavored gelatin (about 2 1/4 teaspoons)
- 1/4 cup cold water
- 1 can (15 ounces) 100% pure pumpkin puree (NOT pie filling)
- 3/4 cup packed dark brown sugar
- 1/2 cup whole milk
- 1 teaspoon ground cinnamon
- 1/2 teaspoon ground ginger
- 1/4 teaspoon ground nutmeg
- 1/4 teaspoon ground allspice (or cloves)
- 1/2 teaspoon kosher salt
- 1 1/2 cups cold heavy whipping cream
- 1/4 cup granulated sugar
- 1 teaspoon vanilla extract
Ingredients Notes
- Gingersnaps: Any store-bought brand of crisp, spicy gingersnaps will work perfectly. You can crush them in a food processor (the fastest way) or put them in a zip-top bag and use a rolling pin.
- Pumpkin: This is critical! You MUST use 100% Pure Pumpkin Puree. Do not buy “Pumpkin Pie Filling,” which is pre-sweetened and spiced. We want to control the flavor ourselves.
- Gelatin: This is our magic ingredient. It’s what makes the pie set up without baking. Don’t be afraid of it! Blooming it in cold water first is the key.
- Heavy Cream: For the lightest, fluffiest chiffon, your heavy cream needs to be very cold. This helps it whip up to stiff peaks and hold its shape.
How to Make This Easy No-Bake Pumpkin Chiffon Pie
- Make the Crust: In a medium bowl, combine your gingersnap crumbs, melted butter, optional sugar, and salt. Use a fork to mix until the crumbs are all evenly moistened, like wet sand.
- Press the Crust: Dump the crumbs into a 9-inch pie plate. Use the back of a spoon or the flat bottom of a measuring cup to press the crumbs firmly and evenly onto the bottom and up the sides of the dish.
- Chill the Crust: This is a no-bake crust, too! Place the pie plate in the freezer for at least 30 minutes (or in the fridge for 1 hour) to set up firmly.
- Bloom the Gelatin: Pour the 1/4 cup of cold water into a small, shallow bowl. Sprinkle the envelope of gelatin evenly over the top. Let it sit for 5-10 minutes without stirring. It will absorb the water and become thick and jiggly.
- Make the Pumpkin Base: In a medium saucepan (off the heat), whisk together the pumpkin puree, brown sugar, whole milk, all the spices (cinnamon, ginger, nutmeg, allspice), and salt.
- Cook the Base: Place the saucepan over medium heat. Cook, stirring constantly, until the mixture is hot and just beginning to bubble around the edges, about 5-7 minutes. You are not trying to boil it, just heat it through and dissolve the sugar.
- Melt the Gelatin: Turn off the heat. Scrape the “bloomed” gelatin mixture into the hot pumpkin base. Whisk constantly until the gelatin is completely dissolved and no lumps remain (about 1-2 minutes).
- Cool the Base: This step is crucial. Pour the hot pumpkin mixture into a large bowl and let it cool at room temperature for at least 45 minutes, or until it is lukewarm or at room temperature. You can speed this up in the fridge, but stir it every 10 minutes so it doesn’t set.
- Whip the Cream: While the base is cooling, make your whipped cream. In a large, chilled bowl, combine the cold heavy cream, 1/4 cup granulated sugar, and vanilla extract.
- Beat to Stiff Peaks: Using an electric hand mixer or a stand mixer, beat the cream on medium-high speed. It’s done when it’s thick, fluffy, and holds a stiff peak (when you lift the beaters, the peak holds its shape and doesn’t flop over).
- Fold, Don’t Stir (Part 1): Your pumpkin base should be cool now (if it’s warm, it will melt the cream). Scrape about one-third of the whipped cream into the pumpkin bowl. Use a spatula to fold it in gently to lighten the base.
- Fold (Part 2): Add the remaining whipped cream to the bowl. Now, fold very gently. Go down the middle, scrape along the bottom, and “fold” the batter over. Turn the bowl a quarter-turn and repeat. Keep doing this just until no white streaks remain. You want to keep all that air you whipped in!
- Fill and Chill: Pour the light, airy pumpkin chiffon filling into your chilled gingersnap crust. Use your spatula to spread it evenly.
- The Final Chill: Cover the pie loosely with plastic wrap (don’t let it touch the top). Refrigerate for at least 6 hours, or preferably overnight. The pie must be completely firm before you slice it.
- Serve: Garnish with extra whipped cream (a must!) and a dusting of cinnamon or gingersnap crumbs.
Alternative Recipe: Creamy Vegan Pumpkin Mousse Pie (Gelatin-Free)
What if you have guests who are dairy-free or vegan? You can make an equally delicious and creamy version using coconut cream and cornstarch. This version is more of a rich “mousse” than a “chiffon,” but it’s still 100% no-bake and 100% delicious.
Alternative Crust Ingredients:
- Use the same gingersnap crust recipe, but make sure your cookies are vegan (many are!) and use vegan butter or melted coconut oil.
Alternative Filling Ingredients:
- 2 cans (13.5 ounces each) full-fat coconut cream, chilled overnight (must be the cream, not milk)
- 1 can (15 ounces) 100% pure pumpkin puree
- 3/4 cup pure maple syrup
- 1/3 cup cornstarch
- 1 1/2 teaspoons pumpkin pie spice
- 1/2 teaspoon salt
- 2 teaspoons vanilla extract
Instructions for the Alternative Recipe:
- Prepare and Chill the Crust: Make the gingersnap crust using vegan butter or coconut oil. Press it into your pie plate and chill in the freezer for 30 minutes.
- Separate the Coconut Cream: Open your two chilled cans of coconut cream. The thick, white cream will have risen to the top. Carefully scoop only this solid cream into a large, chilled mixing bowl, leaving the watery part behind.
- Whip the Coconut Cream: Using an electric mixer, beat the solid coconut cream on high speed for 3-5 minutes until it’s light, fluffy, and holds stiff peaks, just like whipped cream. Set this aside.
- Make the Pumpkin Base: In a medium saucepan, whisk together the pumpkin puree, maple syrup, cornstarch, pumpkin pie spice, and salt. Make sure the cornstarch is completely dissolved before you turn on the heat.
- Cook and Thicken the Base: Place the saucepan over medium heat. Whisk constantly. As it heats up, it will begin to thicken. Once it starts to bubble, keep whisking for 1-2 minutes until it’s very thick, like a pudding.
- Cool the Base: Remove from the heat and stir in the vanilla. Transfer the thick pumpkin pudding to a large bowl and let it cool completely to room temperature.
- Fold and Combine: Just like in the main recipe, fold the whipped coconut cream into the cooled pumpkin base, working in two batches. Be gentle to keep the air.
- Fill and Chill: Spread the vegan mousse filling into your chilled crust. Refrigerate for at least 6 hours, or overnight, to set up firmly. Serve cold.
Storage Options
This pie is your friend in the fridge. It must be stored, covered, in the refrigerator. It will not hold its shape at room temperature for long.
It will keep beautifully for up to 4 days. I actually think the flavor is best on day two! You can also freeze this pie. To do so, let it set completely, then freeze it uncovered for 1 hour. Once solid, wrap it tightly in plastic wrap and then foil. It will keep for up to 1 month. Let it thaw in the refrigerator overnight before serving.
Variations and Substitutions
This pie is a perfect canvas for your own creative twists.
- Crust Swap: Not a gingersnap fan? Use a store-bought (or homemade) graham cracker crust. A chocolate cookie (Oreo) crust is also a fantastic, decadent option.
- Spice it Up: If you don’t have all the individual spices, just use 2 teaspoons of a pre-made “pumpkin pie spice” blend. For a unique twist, add 1/8 teaspoon of ground cardamom or black pepper.
- Toppings Bar: The only thing this pie needs is more whipped cream on top. But you can also set out bowls of mini chocolate chips, a caramel drizzle, or toasted pecans for a “build-your-own” slice.
- For a Lighter Crust: If you’re watching your budget or just want a simpler base, you can press the crumbs into the bottom of the pie plate only and not up the sides.
Practical & Valuable Tips
Tip 1: The “Bloom” is Everything. When using gelatin, you must let it “bloom” (soak) in cold water first. If you dump the dry powder into the hot pumpkin, it will clump and never dissolve, and your pie will not set.
Tip 2: Fold, Don’t Stir. The “chiffon” texture comes from the air you whipped into the heavy cream. If you stir or whisk it into the pumpkin base, you will deflate it all. Use a large spatula and a gentle “scoop-and-fold” motion.
Tip 3: Be Patient and Chill. I know, it’s the hardest part. You cannot rush the chill time. Six hours is the minimum. If you try to slice it after only 2 or 3 hours, it will be a soupy, sad mess.
Tip 4: Cold is Key for Cream. For both the heavy cream and the coconut cream, they must be very cold to whip. I even stick my mixing bowl and beaters in the freezer for 10 minutes beforehand. This guarantees you’ll get those perfect, stiff peaks.
Frequently Asked Questions
- Why is my pie soupy? Why didn’t it set? There are two likely culprits. Either your gelatin didn’t dissolve properly (you didn’t bloom it or didn’t whisk it into the hot base well enough), or you simply didn’t chill it long enough. It needs a full 6 hours, minimum!
- Can I use a regular baked pastry crust for this? You absolutely can, but with one important rule: you must fully blind-bake the crust first. A par-baked or raw crust will be a soggy disaster. Bake it completely, let it cool 100%, and then add the filling.
- I bought pumpkin pie filling by mistake. Can I still use it? I would strongly advise against it. Pumpkin pie filling is already sweetened, spiced, and has thickeners. This recipe is balanced for pure pumpkin. Using the filling will make the pie overly sweet and the texture will be strange.
- How is this different from a regular baked pumpkin pie? The texture is the biggest difference. A baked pie is a dense, rich, set custard (like a crème brûlée). A chiffon pie is light, airy, and fluffy (like a mousse).
- Can I make this pie lower in sugar? You can, but it will affect both flavor and texture. In the chiffon, the sugar helps stabilize the whipped cream. You could reduce the 1/4 cup of sugar in the whipped cream, but I would not reduce the brown sugar in the base, as it adds essential flavor and moisture.
This Easy Pumpkin Pie Recipe is so simple and so delicious, it will change your holiday baking game forever. It’s the perfect, stress-free dessert for any fall gathering.
If you make this pie and love it (which I know you will!), I would be so thrilled if you’d save it to your favorite holiday board on Pinterest. It helps others find their new favorite dessert, too! Enjoy!





Leave a Comment