Let’s talk about that undeniable, universal craving for something salty, savory, and unbelievably crunchy. It’s the kind of snack attack that often leads us straight to a bag of greasy potato chips or crackers. We have all been there, searching through the pantry for that perfect, satisfying crunch.
But what if you could satisfy that exact same craving with a delicious snack that is actually incredibly good for you? A little nutritional powerhouse that is packed with plant-based protein and fiber, and gets perfectly crispy and golden right in your oven. It sounds like the perfect healthy snack, doesn’t it?
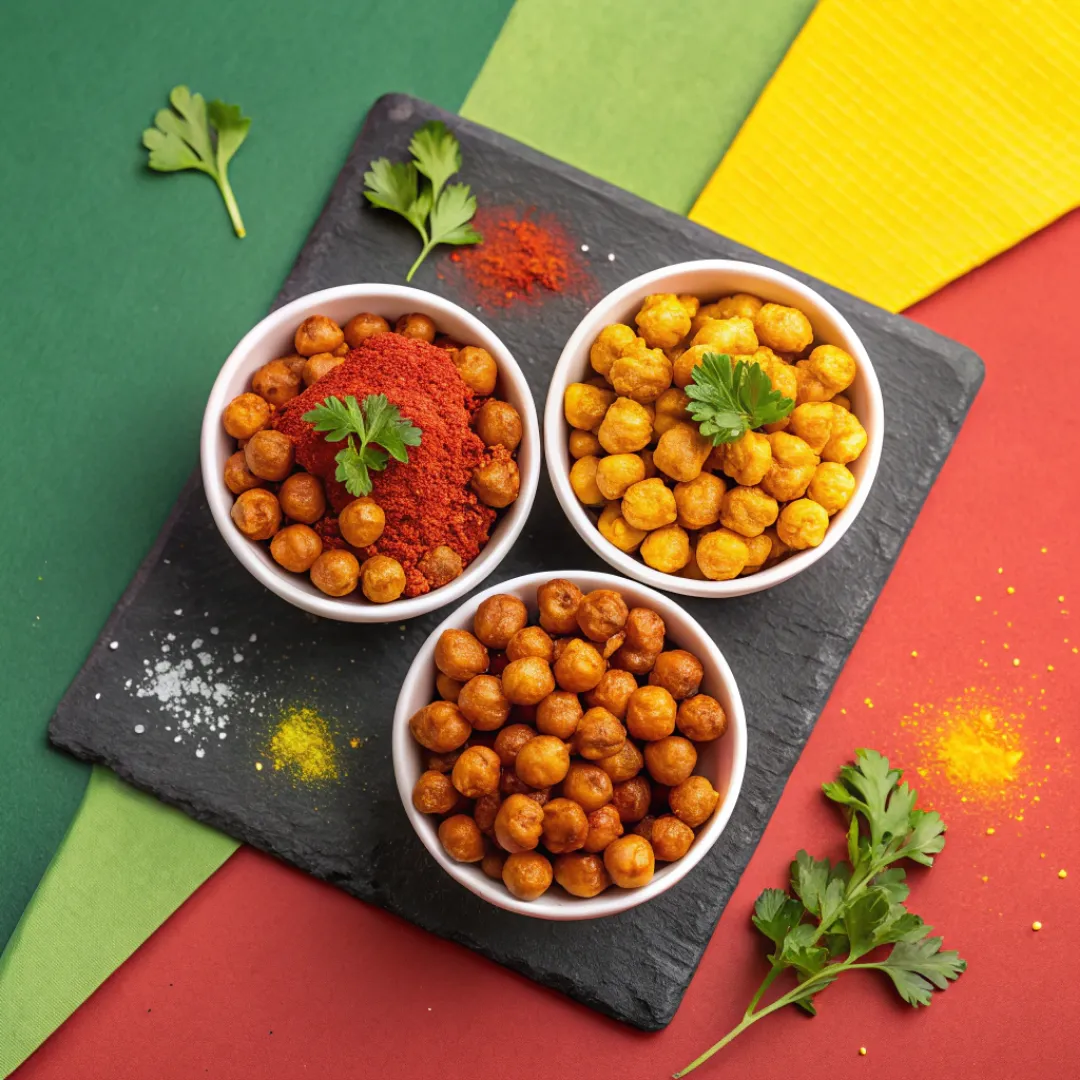
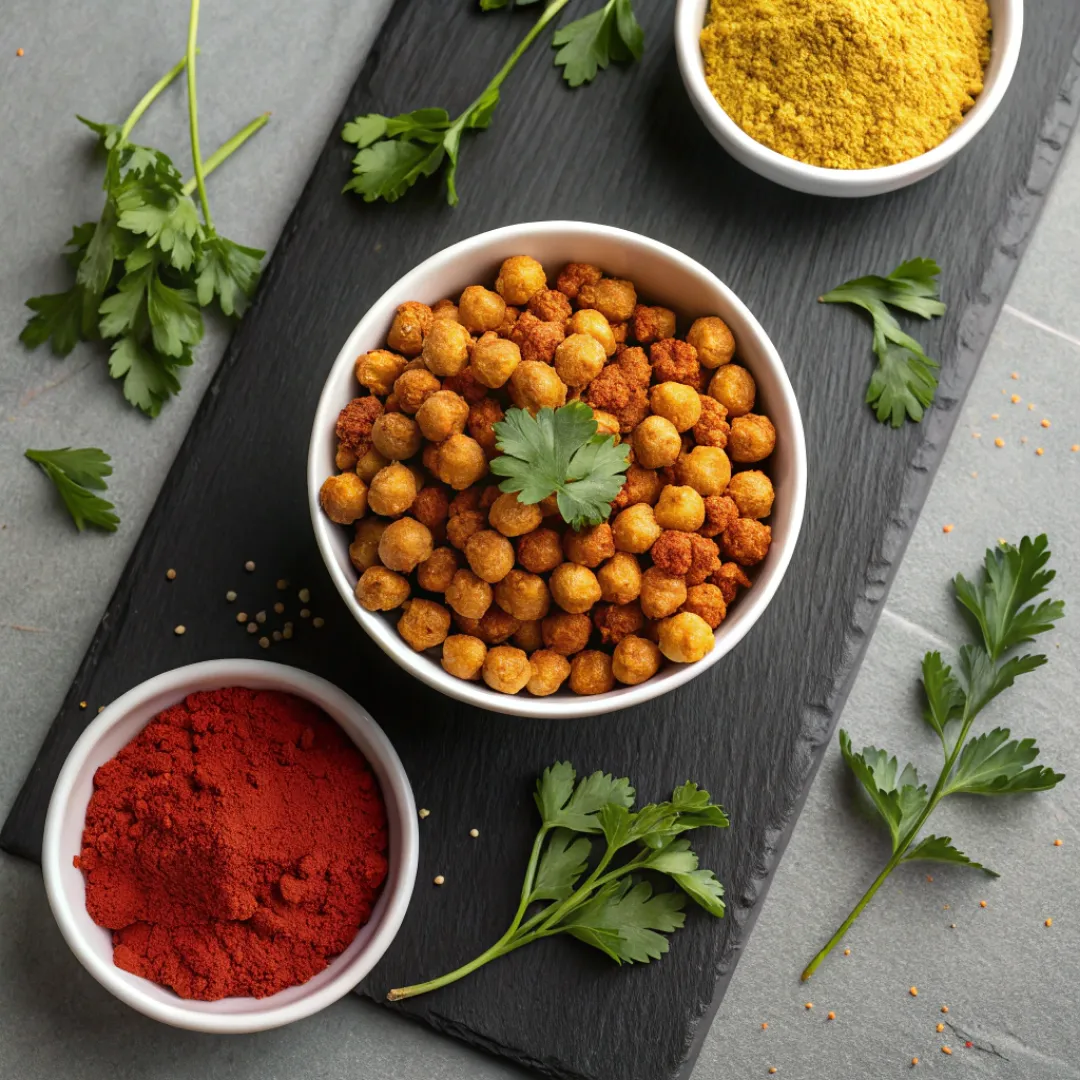
Today, we are making these incredible Crispy Roasted Chickpeas. This simple recipe will show you the secrets to transforming a humble can of chickpeas into the most addictive, guilt-free snack you have ever had. Get ready to meet your new favorite way to crunch.
The Ultimate Guilt-Free Snack: Healthy Roasted Chickpeas
These Healthy Roasted Chickpeas are a fantastic and nourishing alternative to traditional salty snacks. The simple process of roasting transforms the soft beans into wonderfully crispy, crunchy morsels. It is a simple, whole-food snack that is packed with nutrients and incredible flavour.
A Perfect Easy High-Protein Snack for Simple Savory Recipes
You will find that this is the perfect easy high-protein snack. Chickpeas are a wonderful source of plant-based protein and fiber, which helps to make this a very filling and satisfying treat. This is also one of the best simple savory recipes you can make, as it requires minimal effort and is a perfect blank canvas for all of your favorite spice blends.
Your Guide: How to Make Chickpeas Crispy Not Chewy
For anyone wondering how to make chickpeas crispy not chewy, the absolute most important secret is to make sure your chickpeas are as dry as you can possibly get them before they go into the oven. This means rinsing them well, draining them, and then taking the extra minute to pat them completely dry with a clean kitchen towel or paper towels. Roasting them at a high temperature in a single, even layer is also crucial, as this allows them to roast and get crispy, rather than steaming and staying soft.
Why You’ll Love These Crispy Roasted Chickpeas
You are going to love this recipe because the chickpeas become so unbelievably crispy and crunchy, they are the perfect healthy substitute for chips or crackers. You’ll also adore that it’s an incredibly easy and budget-friendly recipe to make, using just a can of chickpeas and a few simple pantry spices. Plus, it’s a wonderfully versatile snack that you can customize with an endless variety of your favorite flavor combinations.
Nutritional Benefits
This beautiful and simple snack is a true nutritional powerhouse that you can feel amazing about eating. The chickpeas are absolutely packed with high-quality, plant-based protein and dietary fiber, which are essential for keeping you feeling full and for supporting a healthy digestive system. They are also a great source of important minerals like iron and folate, making this a truly well-rounded and nourishing snack.
Full Recipe
Are you ready to create the easiest, crispiest, and most addictive healthy snack you’ve ever tried? This detailed guide will walk you through the unbelievably simple process, including all the secrets for achieving the perfect crunch. Get ready to master a new go-to recipe that will change the way you think about snacking.
A healthy, easy, and incredibly delicious recipe for the best Crispy Roasted Chickpeas. This simple method transforms canned chickpeas into a crunchy, savory, and addictive snack that is packed with protein and fiber. This is the ultimate guilt-free, customizable, and “better than chips” snack for any occasion.
Prep Time: 10 minutes | Cook Time: 30 minutes | Total Time: 40 minutes | Yield: 4 servings | Category: Snack, Appetizer | Method: Roasting, Baking | Cuisine: American, Mediterranean | Diet: Vegan, Gluten-Free, Dairy-Free
Essential Ingredients for Crispy Roasted Chickpeas
This healthy and crunchy snack comes together with just a handful of simple pantry staples.
- Chickpeas: 1 can (15 oz / 425g) of chickpeas (also known as garbanzo beans)
- Fat: 1 tablespoon of olive oil
- For the Savory Seasoning:
- 1 teaspoon smoked paprika
- ½ teaspoon garlic powder
- ½ teaspoon onion powder
- ½ teaspoon salt
- Optional: a pinch of cayenne pepper for a spicy kick
Ingredients Notes
A little more detail on our key ingredients will ensure your roasted chickpeas are perfectly crispy.
- The Chickpeas: The key to the incredible ease of this recipe is using a can of pre-cooked chickpeas. Be sure to drain the chickpeas from the can and then rinse them very well under cold water. The most important step, as we will see, is to then get them as dry as you possibly can.
- The Olive Oil: A little bit of a good quality olive oil is essential for this recipe. The oil not only helps all of your delicious seasonings to adhere to the chickpeas, but it is also what helps them to become beautifully golden-brown and crispy as they roast in the hot oven.
- The Seasoning: A simple, savory seasoning blend is perfect for these roasted chickpeas. The smoked paprika provides a wonderful, deep, smoky flavour and a beautiful reddish color. You can easily customize this blend with any of your other favorite spices and herbs.
How to Make Crispy Roasted Chickpeas
Let’s walk through the incredibly simple steps to transform a humble can of beans into a crunchy, delicious snack.
- Step 1: Prepare the Oven and Chickpeas. First, preheat your oven to a hot 200°C (400°F). Line a large, rimmed baking sheet with parchment paper. Drain and rinse your can of chickpeas very well.
- Step 2: The Crucial Drying Step. This is the most important step for crispy chickpeas! Pour the rinsed chickpeas onto a clean kitchen towel or a thick layer of paper towels. Gently roll them around and pat them until they are completely and thoroughly dry.
- Step 3: Season the Chickpeas. In a medium bowl, combine the very dry chickpeas with the olive oil, the smoked paprika, the garlic powder, the onion powder, the salt, and the optional cayenne pepper. Toss everything together until every single chickpea is evenly and generously coated.
- Step 4: Roast to Crispy Perfection. Pour the seasoned chickpeas onto your prepared baking sheet. Spread them out into a single, even layer, making sure they are not overcrowded. Roast for 20 to 30 minutes, shaking the pan once halfway through the cooking time, until the chickpeas are golden brown and crispy.
- Step 5: Cool and Enjoy. Let the roasted chickpeas cool on the baking sheet for a few minutes. They will become even crispier as they cool down. Enjoy your delicious and healthy snack.
Storage Options
These crispy roasted chickpeas are at their absolute best and crunchiest on the day they are made. If you have leftovers, you can store them in an airtight container at room temperature for up to 3 days. Please be aware that they will gradually lose some of their crispiness as they sit.
To re-crisp any leftover chickpeas, you can simply pop them back into a hot oven or an air fryer for just a few minutes until they are crunchy again.
Variations and Substitutions
This simple recipe is a fantastic and versatile template for all kinds of amazing flavor combinations. For a different savory flavour, you could toss the chickpeas with a tablespoon of ranch seasoning or some everything bagel seasoning. For a sweeter version, you could toss them with a little bit of cinnamon and a touch of maple syrup after they have been roasted. You can also experiment with other spices like curry powder, chili powder, or dried herbs like rosemary.
Practical & Valuable Tips
I cannot emphasize this enough: the most important tip for this recipe is to get your chickpeas as dry as you possibly can before you season and roast them. For the crispiest result, it is also very important not to overcrowd your baking sheet; give the chickpeas plenty of space to roast in the hot air. Finally, be sure to let the chickpeas cool for at least 10 minutes on the pan after they come out of the oven, as they will get significantly crunchier as they cool down.
Frequently Asked Questions
- Can I use dried chickpeas that I cook myself for this recipe? Yes, absolutely. You would just need to cook your dried chickpeas according to the package directions first. After they are cooked, you would then proceed with the recipe by rinsing, drying, and roasting them as directed.
- My roasted chickpeas are not very crispy. What did I do wrong? The two most common reasons for chickpeas that are not crispy are that they were not dried well enough before baking, or they were overcrowded on the pan. Any excess moisture will cause the chickpeas to steam instead of roast, which will result in a chewy texture.
- How do I store the roasted chickpeas to keep them crispy? The best way to store them is in a container that is not completely airtight, such as a paper bag or a glass jar with the lid slightly ajar. Storing them in a completely sealed, airtight container can sometimes trap a small amount of residual moisture, which can soften them.
- Can I make these in my air fryer instead of the oven? Yes, an air fryer is a fantastic tool for making chickpeas extra crispy! You would simply prepare them as directed and then cook them in the air fryer at 200°C (400°F) for about 12-15 minutes, shaking the basket a few times, until they are golden brown and crispy.
- What are some other good seasoning ideas for these chickpeas? The possibilities are endless! Some other fantastic seasoning combinations include a simple mix of chili powder and lime zest for a Mexican-inspired flavour. A blend of cinnamon and sugar for a sweet treat is also delicious. Or you can try a simple rosemary and garlic combination for a rustic, savory snack.
Conclusion
These Crispy Roasted Chickpeas are the ultimate solution for a healthy, crunchy, and incredibly satisfying snack. It’s a dish that proves you can satisfy your biggest salty snack cravings in a way that is nourishing, delicious, and completely guilt-free. It’s a simple, versatile, and budget-friendly recipe that is guaranteed to become a new staple in your healthy snacking routine. This is a Healthy Snack you will be so glad you made. If you love this easy and delicious recipe, don’t forget to share it and save it to your favorite healthy snacks board on Pinterest!


Leave a Comment