Hello, fellow bakers! Let’s talk about tradition. When the air gets crisp and the holidays roll around, we all start thinking about those big, celebratory meals. And let’s be honest, when it comes to the Thanksgiving dessert table, there’s one king that rules them all: the pumpkin pie.
But I’m not talking about some new, fancy, complicated version with a dozen trendy ingredients. I’m talking about the pie. The one you grew up with. The one that tastes like every good Thanksgiving memory you’ve ever had, all rolled into one creamy, perfectly spiced slice.
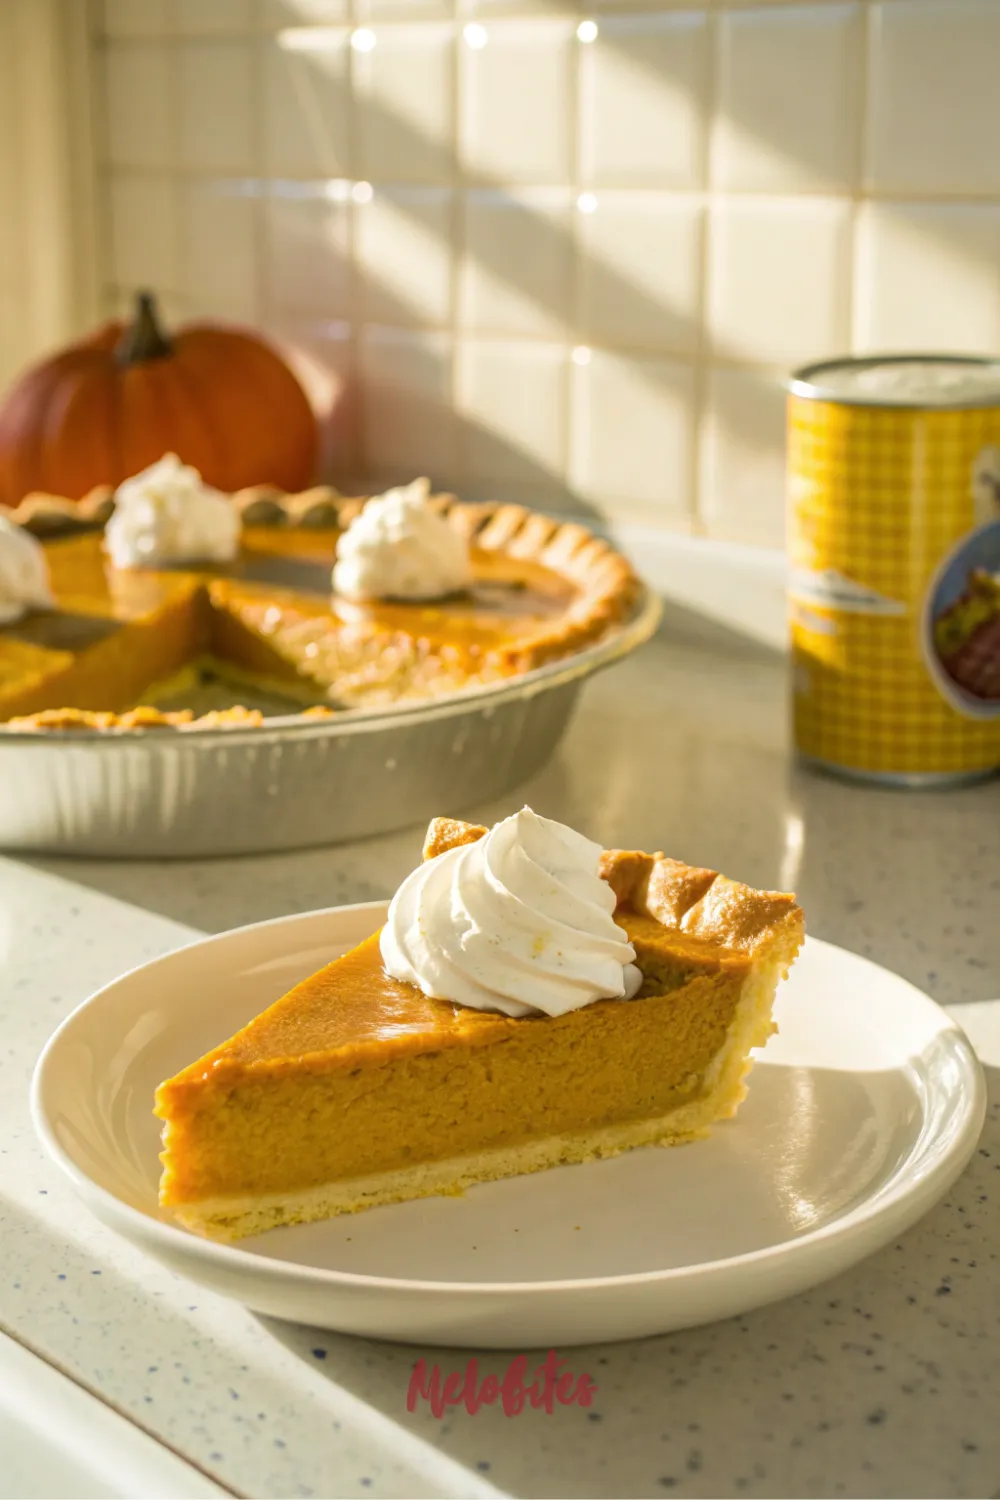
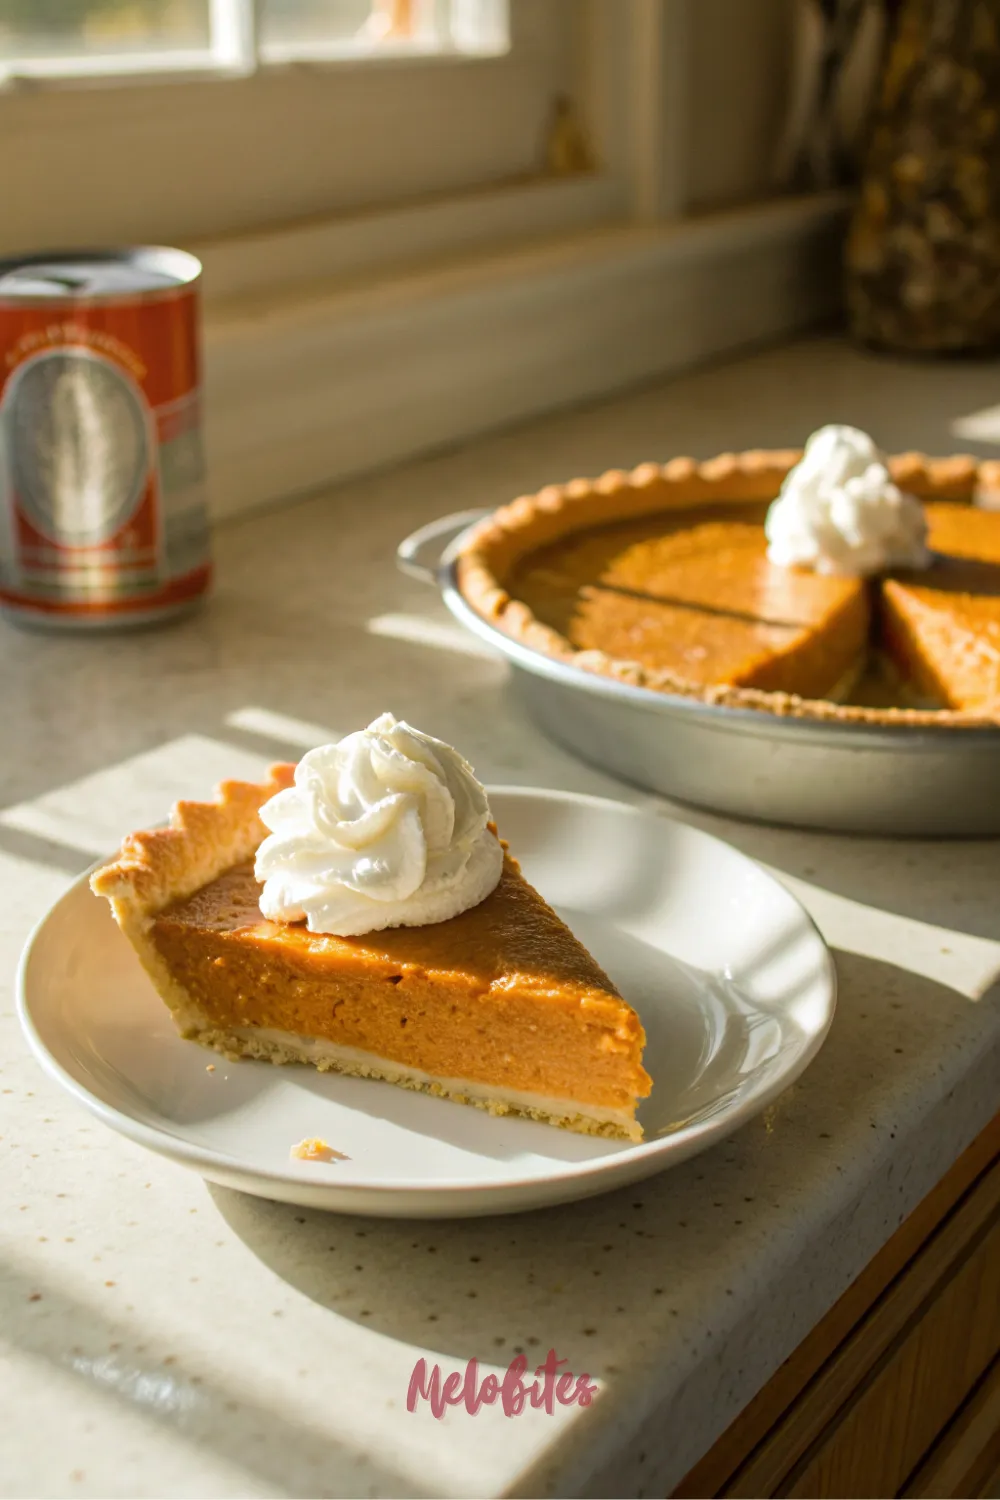
I am, of course, talking about the original, the famous, the absolutely timeless Libby’s Pumpkin Pie Recipe. It’s the one printed right on the back of that iconic orange can for a reason. In a world of culinary complexity, this pie is a beautiful, delicious, and simple slice of perfection, and today, we’re going to master it.
The Power of the Libby’s Pumpkin Pie Recipe
So, what is it about the Libby’s pumpkin pie recipe that has made it an American icon for generations? It’s all about reliability. This isn’t a finicky, temperamental recipe that will fail you on the big day.
It’s a trusted, time-tested formula that delivers a perfectly creamy, well-set, and flavorful pie every single time. It’s the gold standard, the benchmark by which all other pumpkin pies are judged. This is the recipe that makes anyone feel like a professional baker.
Why This is the Famous Pumpkin Pie from Canned Pumpkin Recipes
This is, without a doubt, the most famous pumpkin pie on the planet, and it’s the hero of all canned pumpkin recipes. Why? Because it’s built on a pantry staple that is consistent, high-quality, and available everywhere. You don’t have to break down a giant, stringy pumpkin to get that perfect flavor.
Libby’s has perfected their 100% Pure Pumpkin, and this recipe was designed specifically for it. It’s a perfect partnership between a simple ingredient and a simple method that creates a truly extraordinary result. It’s the definition of “don’t mess with a good thing.”
Your Go-To Easy Thanksgiving Dessert to Make with Canned Pumpkin
Let’s face it, the holidays are stressful enough. Between the turkey, the timing, and the side dishes, the last thing you need is a complicated dessert. This is, hands down, the easiest and most rewarding easy Thanksgiving dessert to make with canned pumpkin.
There are no fancy techniques, no strange ingredients, and no complicated steps. You just mix, pour, and bake. It’s the perfect recipe for a first-time pie maker, and it’s the secret weapon for seasoned pros who need a guaranteed win.
Why You’ll Love This Classic Pumpkin Pie
- It’s Nostalgic: This pie tastes exactly like the holidays should. It’s the warm, spicy, and creamy flavor that instantly transports you to your grandmother’s kitchen.
- It’s (Almost) Foolproof: I promise, this is one of the most reliable homemade pie recipes you will ever make. Just follow the simple steps, and you’ll get a perfect pie.
- The Texture is Perfect: It’s the gold standard for a reason. The filling is firm enough to slice beautifully but melts in your mouth with a creamy, rich custard texture.
- It’s Easy to Find Ingredients: You don’t need to go to a specialty store. Every single ingredient is waiting for you at your local grocery store.
Nutritional Benefits
Let’s be clear, this is a classic, indulgent pie, and it’s meant to be enjoyed! But the wonderful thing about making homemade pie recipes is that you know exactly what’s in them. You’re not getting any strange preservatives or additives.
The star of the show, the pumpkin, is a true nutritional powerhouse. It’s absolutely packed with Vitamin A (amazing for your eyes) and is a great source of fiber. Plus, those wonderful spices like cinnamon and ginger are known for their own warming, anti-inflammatory benefits.
Full Recipe: The Original Famous Libby’s Pumpkin Pie
Prep Time: 15 minutes | Cook Time: 55-60 minutes | Total Time: 1 hour 15 minutes (plus cooling) | Yield: 1 (9-inch) pie, 8 slices | Category: Dessert | Method: Baking | Cuisine: American | Diet: Vegetarian
Essential Ingredients for Libby’s Pumpkin Pie
- 3/4 cup granulated sugar
- 1 teaspoon ground cinnamon
- 1/2 teaspoon kosher salt
- 1/2 teaspoon ground ginger
- 1/4 teaspoon ground cloves
- 2 large eggs
- 1 can (15 ounces) LIBBY’S 100% Pure Pumpkin
- 1 can (12 fluid ounces) Evaporated Milk
- 1 (9-inch) unbaked deep-dish pie shell
Ingredients Notes
- Pumpkin: This is the most important note. You must use 100% Pure Pumpkin (Libby’s is the classic for a reason). Do not accidentally buy “Pumpkin Pie Filling” or “Pie Mix.” Pie filling is already sweetened and spiced, and it will completely ruin your pie.
- Evaporated Milk: This is the secret to the classic creamy texture. Do not substitute it with Sweetened Condensed Milk, which is a totally different, sugary product. You can, in a pinch, use heavy cream, but evaporated milk gives it that signature flavor.
- Spices: The recipe calls for the classic trio of cinnamon, ginger, and cloves. If you don’t have them all, you can substitute 1 3/4 teaspoons of a pre-made “Pumpkin Pie Spice” blend.
- Pie Shell: To keep this easy, a store-bought, unbaked deep-dish pie shell is perfect. You can find these in the refrigerator or freezer section of your grocery store. A deep-dish shell is important to hold all that glorious filling.
How to Make The Famous Libby’s Pumpkin Pie Recipe
- Get Ready: First, preheat your oven to 425°F (220°C). Grab your 9-inch, unbaked, deep-dish pie shell. You can leave it in its foil pan if you bought a frozen one; just let it thaw for about 15 minutes.
- Mix the Dry Stuff: In a small bowl, mix the granulated sugar, salt, cinnamon, ginger, and cloves. This is a key step. Mixing the spices with the sugar first ensures they get perfectly distributed and you don’t get a random pocket of cloves.
- Mix the Wet Stuff: In a separate, large bowl, lightly beat the 2 large eggs. Whisk in the can of 100% pure pumpkin.
- Combine and Add Milk: Add the sugar-and-spice mixture to the pumpkin bowl. Whisk it all together until it’s well combined.
- The Final Step: Now, gradually pour in the can of evaporated milk, whisking as you go. Keep whisking until the entire mixture is smooth, uniform in color, and silky.
- Pour and Bake (Part 1): Pour the filling into your unbaked pie shell. It should fill it right up. Carefully place the pie on a baking sheet (this catches drips and makes it easier to move) and put it into your preheated 425°F oven.
- Bake (Part 2): Bake at 425°F for 15 minutes. This initial high heat helps set the crust. After 15 minutes, reduce the oven temperature to 350°F (175°C).
- The Long Bake: Continue baking at 350°F for another 40 to 50 minutes.
- The “Jiggle Test”: The pie is done when the edges are set, but the center still has a slight jiggle (like Jell-O). You can also test it with a knife. Insert a thin knife about 1 inch from the center; if it comes out clean, the pie is done.
- Cool Completely (Do Not Skip!): This is the hardest part. You must let the pie cool on a wire rack for at least 2 hours. Do not cut into a warm pie; the filling will be soupy. It needs this time to cool and set up into that perfect, sliceable custard.
Alternative Recipe: The “Black Bottom” Cream Cheese Pumpkin Pie
Love the classic Libby’s pie but want to give it a simple, decadent upgrade? This alternative recipe uses the exact same famous Libby’s filling you just made, but we pour it over a rich, tangy, “black bottom” cream cheese layer. It’s a showstopper, and it’s just as easy.
Essential Ingredients (for the Alternative Pie):
- For the Cream Cheese Layer:
- 1 package (8 ounces) full-fat cream cheese, softened to room temperature
- 1/4 cup granulated sugar
- 1 large egg
- 1/2 teaspoon vanilla extract
- 2 ounces semi-sweet chocolate, melted and cooled (optional, but makes it a “black bottom”)
- For the Filling:
- The entire batch of Libby’s Pumpkin Pie filling (from the steps above: pumpkin, sugar, spices, eggs, evaporated milk)
- For the Crust:
- 1 (9-inch) unbaked deep-dish pie shell
How to Make the Cream Cheese Layered Pie:
- Preheat: Preheat your oven to 425°F (220°C).
- Make the Cream Cheese Layer: In a medium bowl, use an electric hand mixer to beat the softened cream cheese and 1/4 cup sugar until smooth and fluffy. Beat in the 1 egg and the vanilla. If you’re using the chocolate, mix it in now.
- Spread the Layer: Spread this cream cheese mixture evenly into the bottom of your unbaked pie shell.
- Make the Pumpkin Filling: In a separate large bowl, prepare the classic Libby’s pumpkin pie filling exactly as described in steps 2-5 of the main recipe.
- Pour Gently: Gently and slowly pour the pumpkin filling over the top of the cream cheese layer. The cream cheese is dense, so the pumpkin filling will float on top.
- Bake (Part 1): Bake at 425°F for 15 minutes.
- Bake (Part 2): Reduce the oven temperature to 350°F (175°C) and continue to bake for 45-55 minutes.
- Check for Doneness: This pie will be a little puffier. The “jiggle test” is still your best friend. The center should be mostly set, with just a slight wobble.
- Cool Completely: This pie absolutely must cool on a wire rack for at least 2 hours, then be transferred to the refrigerator to chill for another 4 hours, or overnight. The cream cheese layer needs to be fully chilled to set.
Storage Options
This is a custard pie, which means it contains eggs and dairy. It must be stored in the refrigerator.
Once the pie has cooled completely (and I mean 100% to room temperature), cover it loosely with plastic wrap or aluminum foil. It will keep beautifully in the fridge for 3 to 4 days. In fact, many people (myself included) think the flavor is even better on day two!
You can also freeze this pie. Bake it and let it cool completely. Freeze the whole pie, uncovered, on a baking sheet until it’s rock-solid (about 3-4 hours). Then, wrap it tightly in two layers of plastic wrap, followed by a layer of aluminum foil. It will keep for up to 2 months. To thaw, just place it in the refrigerator overnight (do not thaw at room temperature).
Variations and Substitutions
The classic recipe is a perfect starting point. But here are a few simple swaps you can make.
- Spice It Up: As mentioned, you can swap the individual spices for 1 3/4 teaspoons of pumpkin pie spice. For a warmer pie, you can also up the cinnamon to 1 1/2 teaspoons.
- The Sugar: Want a deeper, more molasses-like flavor? Use packed dark brown sugar instead of granulated sugar.
- The Milk: If you don’t have evaporated milk, you can substitute 1 1/2 cups of heavy whipping cream. The texture will be slightly richer and denser, and it’s absolutely delicious.
- The Crust: This filling is a perfect match for a pre-baked graham cracker crust or a spicy gingersnap crust. Just pour the unbaked filling into the pre-baked crust and bake at 350°F for 50-60 minutes (skip the high-heat step).
Practical & Valuable Tips
Tip 1: Read the Can! (The #1 Mistake) I’m saying this one more time because it’s that important. Always, always double-check your can. Make sure it says 100% PURE PUMPKIN and not “Pumpkin Pie Filling.” “Pie Filling” will make your pie a sweet, soupy, and tragic mess.
Tip 2: The Pie Shield is Your Best Friend The edges of a pie crust bake much faster than the center. To prevent your beautiful crust from turning black, make a “pie shield.” After the first 25-30 minutes of baking at 350°F, check the crust. If it’s perfectly golden brown, cut a ring out of aluminum foil and gently lay it over the edges of the pie, leaving the center exposed.
Tip 3: The “Jiggle Test” Explained What does a “slight jiggle” even mean? It means the center, an area about 2-3 inches wide, should wobble just a bit, like Jell-O. If the whole pie sloshes around like a liquid, it’s not done. If it’s totally solid and doesn’t move at all, you’ve already over-baked it, and it will likely crack.
Tip 4: The Slow Cool is the Secret to No Cracks A crack in a pumpkin pie is caused by a sudden temperature change. Don’t take your hot pie and stick it right in the cold fridge. Let it cool completely at room temperature, on a wire rack, for at least 2 hours. This gentle, slow cool-down is the key to a flawless, smooth top.
Frequently Asked Questions
- Why did my pumpkin pie crack? This is the most common question! It’s almost always one of two things: you over-baked it, or you cooled it too quickly. Pull it from the oven when it still has that slight jiggle and let it cool slowly at room temperature.
- Can I use fresh pumpkin instead of canned? You can, but it’s a lot of work and can be watery. To do it, you must use a “sugar pie” or “pie pumpkin” (not a carving pumpkin). Roast it, scrape out the flesh, and puree it. Then, you must let the puree drain in a cheesecloth-lined strainer for at least an hour to get rid of all the excess water.
- Why is my pie watery or soupy? You most likely under-baked it. It needs that chill time to fully set. The other possibility is that you used the wrong milk, like regular skim milk or almond milk, which doesn’t have enough fat to create a firm custard.
- Can I make this pie dairy-free? Yes, and it’s very easy! Use a can of “Evaporated Coconut Milk” (you can find this in most grocery stores now) in place of the regular evaporated milk. And, of course, make sure you’re using a store-bought crust that is certified dairy-free or vegan.
- Can I make this pie ahead of time? You absolutely should! This pie needs to chill, which makes it the perfect make-ahead dessert. Bake it the day before Thanksgiving, let it cool, and then just keep it in the fridge overnight. It frees up your oven and reduces your stress.
This Libby’s pumpkin pie recipe truly is a timeless classic for a reason. It’s the simple, honest, and delicious heart of the holiday table.
There’s nothing better than bringing this famous pumpkin pie to a gathering, knowing it’s going to be perfect. If this is your family’s go-to tradition, I’d love for you to save this post and pin it to your “Thanksgiving Desserts” board on Pinterest. Happy baking!


Leave a Comment