Hello, my friends! Let’s talk about holiday baking.
It’s that time of year when our kitchens are a beautiful, chaotic mess. You’ve got four things in the oven, two on the stove, and a relative is asking you where the good “guest towels” are.
The last thing you have time for is a fussy, complicated dessert.
We all dream of that perfect, showstopping pumpkin pie. But we also live in fear of it. Will the custard set? Will it be watery? Will it crack down the middle like a cartoon earthquake?
What if I told you there was a secret weapon? A single-ingredient hack that guarantees the richest, silkiest, most foolproof pumpkin pie of your life, every single time.
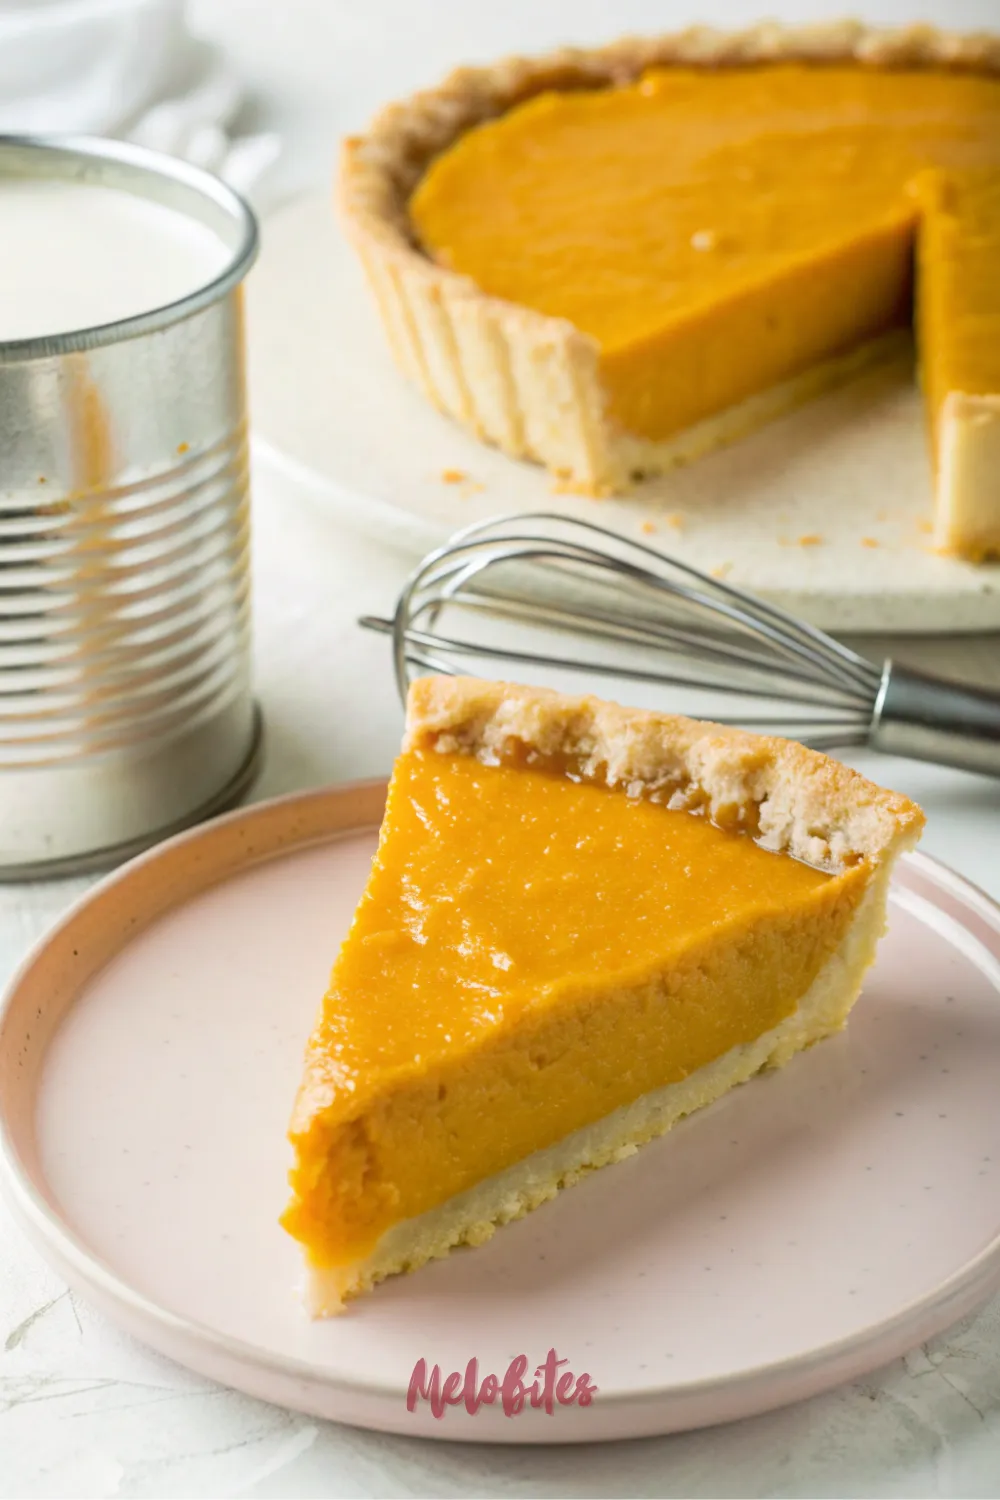
It’s not a fancy, expensive specialty item. It’s that humble, magical can of sweetened condensed milk.
This isn’t just a shortcut, my friends. This is, in my opinion, an upgrade. This is the pie that saves your sanity and steals the show.
The Magic of a Pumpkin Pie Recipe with Condensed Milk
So, what’s the big deal? Why is this pumpkin pie recipe with condensed milk a total game-changer?
It’s all about the “two-for-one” magic. Sweetened condensed milk isn’t just milk; it’s milk that has been cooked down with sugar.
This means it replaces both the evaporated milk and the granulated sugar in a traditional recipe. It’s a thick, rich, perfectly-sweetened custard base, all in one can.
This does two things. First, it makes the recipe incredibly simple (we’re talking “dump-and-stir” easy).
Second, all that pre-cooked, concentrated milk and sugar gives the final pie a texture that is beyond belief. It’s denser, richer, and silkier than any pie you’ve ever had.
Your New Go-To Creamy Pumpkin Pie for Thanksgiving Desserts
If the word you’re looking for is “creamy,” this is your pie. A traditional pie, made with granulated sugar and thinner evaporated milk, can sometimes be a little delicate.
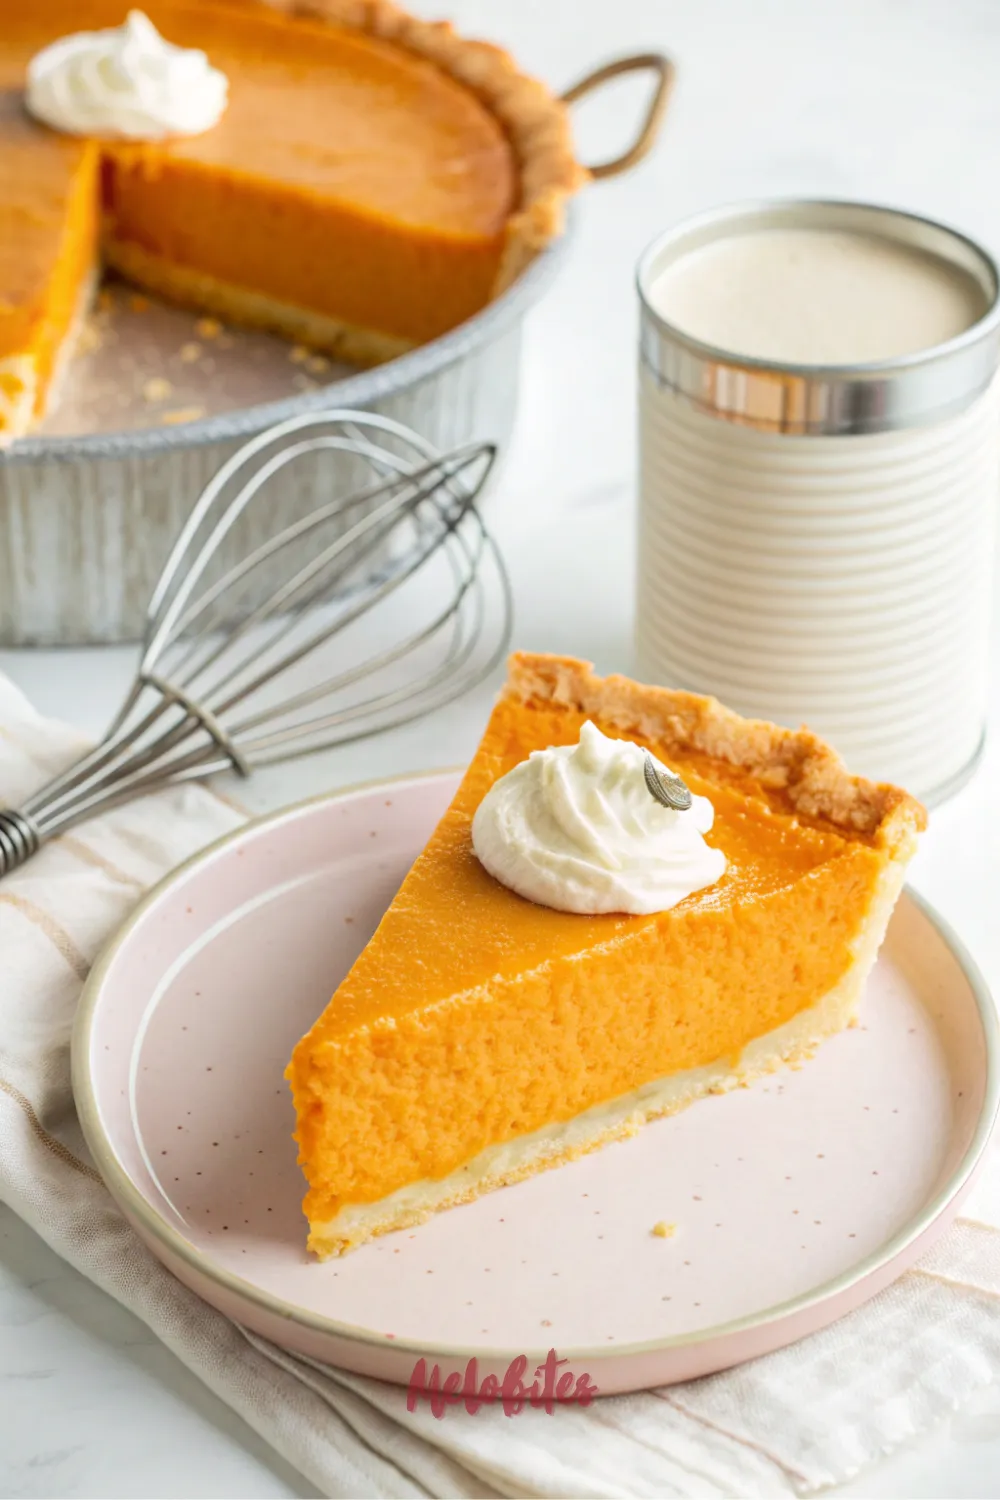
This creamy pumpkin pie, on the other hand, is pure luxury. The condensed milk gives it a velvety, almost-caramel-like undertone and a stunningly smooth mouthfeel.
When you’re planning your Thanksgiving desserts, you want a guaranteed win. This is it. It’s the pie that will have your family asking, “What did you do differently? This is the best one you’ve ever made!”
The Easiest Simple Pumpkin Pie Recipe with Sweetened Condensed Milk
Let’s be honest: we could all use a little less stress. This is, hands down, the most simple pumpkin pie recipe with sweetened condensed milk you will ever find.
If you can hold a whisk, you can make this pie. There’s no complicated measuring, no dissolving sugar, no-fault.
It’s the perfect recipe for a first-time baker. It’s the perfect recipe for a busy host who has 10 other dishes to worry about. It’s the foolproof, no-fail, “I-promise-you-can’t-mess-this-up” dessert that delivers five-star results.
Why You’ll Be Obsessed with This Pie
- It is FOOLPROOF. I’m not kidding. It’s a one-bowl, “dump-and-stir” recipe. The condensed milk provides a stable base that sets up perfectly every single time.
- It’s Incredibly Creamy. The texture is the star. It’s denser, richer, and more velvety than any traditional pie.
- It’s SO Simple. You are literally using five main ingredients. It’s the ultimate “less-is-more” masterpiece.
- It’s a Make-Ahead Dream. This pie needs to chill, which is a gift. You can make it a full day or two before your holiday, and it will be perfect.
Nutritional Benefits
Okay, let’s be 100% real with each other. We are making a pie with a can of sweetened condensed milk. This is not a health food!
This is a glorious, decadent, celebratory dessert, and it is here to be enjoyed.
But, the wonderful thing about homemade pie is that you know exactly what’s in it. There are no weird preservatives, stabilizers, or artificial flavors.
And the star of the show, pumpkin, is a true superfood. It’s absolutely packed with Vitamin A (which is amazing for your eyes) and is loaded with fiber. The eggs also add a nice boost of protein.
So, while it’s a rich indulgence, it’s one made from simple, real ingredients.
Full Recipe: The Ultimate Creamy Pumpkin Pie with Condensed Milk
Prep Time: 10 minutes | Cook Time: 55-65 minutes | Total Time: 1 hour 15 minutes (plus cooling) | Yield: 1 (9-inch) pie, 8 slices | Category: Dessert | Method: Baking | Cuisine: American | Diet: N/A
Essential Ingredients for Pumpkin Pie with Condensed Milk
- 1 (14-ounce) can Sweetened Condensed Milk (NOT evaporated milk)
- 1 (15-ounce) can 100% Pure Pumpkin (NOT pie filling)
- 2 large eggs
- 1 1/2 teaspoons pumpkin pie spice
- 1/2 teaspoon kosher salt
- 1 teaspoon vanilla extract
- 1 (9-inch) unbaked deep-dish pie shell
Ingredients Notes
- Sweetened Condensed Milk: This is the most important part. You must buy the can that says “Sweetened Condensed Milk” (like the Eagle Brand). Do NOT buy “Evaporated Milk.” They are totally different, and your pie will not be sweet or set correctly.
- Pumpkin Puree: This is the other most important part. You must buy 100% Pure Pumpkin. Do NOT, under any circumstance, buy “Pumpkin Pie Filling,” which is pre-sweetened and spiced. You’re already adding your own sweetness!
- Pie Shell: Save your sanity. A store-bought, deep-dish pie shell (frozen or refrigerated) is a total lifesaver and works perfectly. A deep-dish shell is important to hold all this glorious, creamy filling.
- Pumpkin Pie Spice: If you don’t have a pre-made blend, it’s easy to make your own! Just combine 1 teaspoon of ground cinnamon, 1/4 teaspoon of ground ginger, 1/4 teaspoon of ground nutmeg, and a pinch of ground cloves.
How to Make This Foolproof Pumpkin Pie
- Prep Your Oven: First, get your oven preheating to 425°F (220°C). Place your unbaked, deep-dish pie shell on a sturdy baking sheet. This catches any potential drips and makes it much easier to move the unbaked pie.
- Mix the Base: In a large bowl, lightly beat the 2 large eggs.
- Dump and Stir: Add the entire can of sweetened condensed milk, the entire can of pumpkin puree, the pumpkin pie spice, salt, and vanilla extract.
- Whisk Until Smooth: Whisk everything together until it is completely smooth, silky, and uniform in color. This should only take about a minute. Do not over-mix!
- Pour and Bake (Part 1): Pour the glorious, creamy filling into your unbaked pie shell. It should be very full.
- The First Bake: Place the whole baking sheet setup into your screaming-hot 425°F oven. Bake for 15 minutes. This initial blast of high heat helps set the crust and prevents a soggy bottom.
- Reduce Heat and Bake (Part 2): After 15 minutes, reduce the oven temperature to 350°F (175°C). Do not open the oven door!
- The Long Bake: Continue baking at 350°F for another 40-50 minutes.
- The “Jiggle Test”: The pie is done when the edges are set and puffed. The very center (about a 2-3 inch circle) should still have a slight jiggle. It should wobble like Jell-O, not slosh like water.
- Cool Completely (MANDATORY): This is the hardest part and the most important. You must let the pie cool on a wire rack at room temperature for at least 3-4 hours. Do not slice it warm! The custard needs this time to cool and set up into that perfect, sliceable, creamy texture.
Alternative Recipe: The “Next Level” Cream Cheese Layered Pumpkin Pie
Do you love the simple, creamy condensed milk pie, but want to make it even more decadent?
Let’s add a rich, tangy, cheesecake-like layer to the bottom. This is the ultimate “wow-factor” upgrade, and it’s still incredibly easy.
Cream Cheese Layer Ingredients:
- 1 package (8 ounces) full-fat cream cheese, softened to room temperature
- 1/4 cup granulated sugar
- 1 large egg
- 1 teaspoon vanilla extract
How to Make the Alternative Version:
- Preheat Oven: Preheat your oven to 425°F (220°C).
- Make the Cream Cheese Layer: In a medium bowl, use an electric hand mixer to beat the softened cream cheese and sugar until smooth and fluffy. Beat in the 1 egg and the vanilla extract.
- Spread Layer One: Spread this tangy cheesecake mixture evenly into the bottom of your unbaked pie shell.
- Make the Pumpkin Layer: In a separate large bowl, follow steps 2-4 of the main recipe to make the condensed milk pumpkin filling.
- Pour Layer Two: Gently and slowly pour the pumpkin filling over the top of the unbaked cream cheese layer. The cream cheese is dense, so the pumpkin filling will float on top.
- Bake: Follow the exact same baking and cooling instructions as the main recipe (steps 6-10).
- Chill: This version absolutely must be chilled in the refrigerator for at least 4-6 hours (or overnight) to let that cheesecake layer set up. The result is a two-layer masterpiece.
Storage Options
This is a custard pie, which means it must be stored in the refrigerator.
Once the pie has cooled completely (and I mean 100% to room temperature), cover it loosely with plastic wrap or aluminum foil. It will keep beautifully in the fridge for 4 to 5 days.
I’m just going to say it: the flavor and texture are even better on day two. The spices get to meld, and the custard gets even denser and creamier. This is the perfect make-ahead pie.
This pie also freezes like a dream. You can freeze the whole pie or individual slices. Let it chill completely, then freeze it “naked” (uncovered) on a baking sheet until solid. Once solid, wrap it tightly in two layers of plastic wrap, then a layer of aluminum foil. It will keep for up to 2 months. To thaw, just unwrap it and place it in the refrigerator overnight.
Variations and Substitutions
This recipe is a fantastic, foolproof base. Here are a few ways to customize it.
- Make it Dairy-Free: This is an easy swap! Most grocery stores now sell Sweetened Condensed Coconut Milk (or Oat Milk). Use one 11-13 oz can of that, and make sure your pie crust is certified vegan.
- The Crust: This creamy filling is a perfect match for a pre-baked gingersnap crust or a graham cracker crust. The extra spice from a gingersnap crust is especially good.
- Spice it Up: If you love spice, don’t be afraid to use 2 full teaspoons of pumpkin pie spice. You can also add 1/4 teaspoon of ground cardamom or a tiny pinch of black pepper for a modern, sophisticated kick.
- Make it Boozy: Add 2 tablespoons of high-quality bourbon or dark rum to the filling when you add the vanilla. It adds an incredible, warm, complex flavor that is pure magic for an “adults-only” pie.
Practical & Valuable Tips
Tip 1: Read the Cans! (The #1 Mistake) I’m saying this one more time because it’s that important. You must buy Sweetened Condensed Milk (thick, sugary) and 100% Pure Pumpkin (just pumpkin). Do NOT buy Evaporated Milk (thin, unsweetened) or Pumpkin Pie Filling (pre-sweetened).
Tip 2: The Pie Shield is Your Best Friend. This pie bakes for a long time. The exposed edges of your crust will go from “golden” to “black” very quickly. After the first 25-30 minutes of the 350°F bake, check the crust. If it’s perfectly golden, make a “pie shield.” Just cut a large ring out of aluminum foil and gently lay it over the edges of the pie, leaving the center exposed to finish cooking.
Tip 3: The “Jiggle Test” is Key. The biggest mistake is over-baking. A custard pie continues to cook from residual heat. You want to take it out when the center still has a slight wobble (like Jell-O). If it’s rock-solid, it’s overdone, and the texture will be rubbery and it will crack.
Tip 4: The Slow Cool is the Secret to No Cracks. A crack in a pumpkin pie is caused by a sudden temperature change. Don’t take your hot pie and stick it right in the cold fridge. Let it cool completely at room temperature, on a wire rack, for at least 3-4 hours. This gentle, slow cool-down is the key to a flawless, smooth top.
Frequently Asked Questions
- What’s the difference between this and the classic Libby’s pie? The classic Libby’s (on-the-can) recipe uses evaporated milk and granulated sugar. This recipe uses sweetened condensed milk. Both are delicious! The Libby’s version is a bit lighter and more “traditional,” while this condensed milk version is richer, creamier, and denser.
- I bought evaporated milk by accident! Can I still use it? You can, but you’ll have to completely change the recipe. You would need to add about 3/4 cup of sugar and maybe even a little flour or cornstarch to help it set. It’s much easier to just use the correct condensed milk can!
- Why did my pie crack? This is the most common pie problem! It’s almost always one of two things: you over-baked it (see Tip #3) or you cooled it too quickly (see Tip #4). Don’t worry, it still tastes amazing! Just cover it with a generous mountain of whipped cream, and no one will ever know.
- Can I make this pie ahead of time? You must! This pie needs, at a minimum, 4-6 hours of chill time to set up for clean slices. It is the perfect dessert to make the day before Thanksgiving, which frees up your oven and your time.
- Can I use fresh pumpkin puree instead of canned? You can, but it’s a lot of work and can be watery. You must use a “sugar pie” pumpkin (not a carving one). Roast it, puree it, and then strain the puree in a cheesecloth-lined sieve for at least an hour to drain all the excess water.
So there you have it. This is the ultimate Pumpkin Pie Recipe with Condensed Milk.
It’s the foolproof, stress-free, and unbelievably creamy dessert that will make you a holiday hero.
If you’re ready to make the richest, most simple pumpkin pie of your life, this is your recipe. Be sure to save this post and pin it to your “Holiday Baking” or “Thanksgiving Desserts” board on Pinterest. You’re going to want to find this one, year after year. Happy baking!


Leave a Comment