Hello, fellow holiday hosts! Let’s talk about the Thanksgiving dessert table.
It’s that moment of pure panic. You’ve got 15 hungry guests, one beautiful, round pumpkin pie, and a serving knife.
You go in for that first, perfect slice, and what happens? It completely disintegrates. The crust sticks, the filling oozes, and you end up handing your guest a plate of what I can only describe as “pumpkin mush.”
It’s a holiday tradition I’m officially done with.
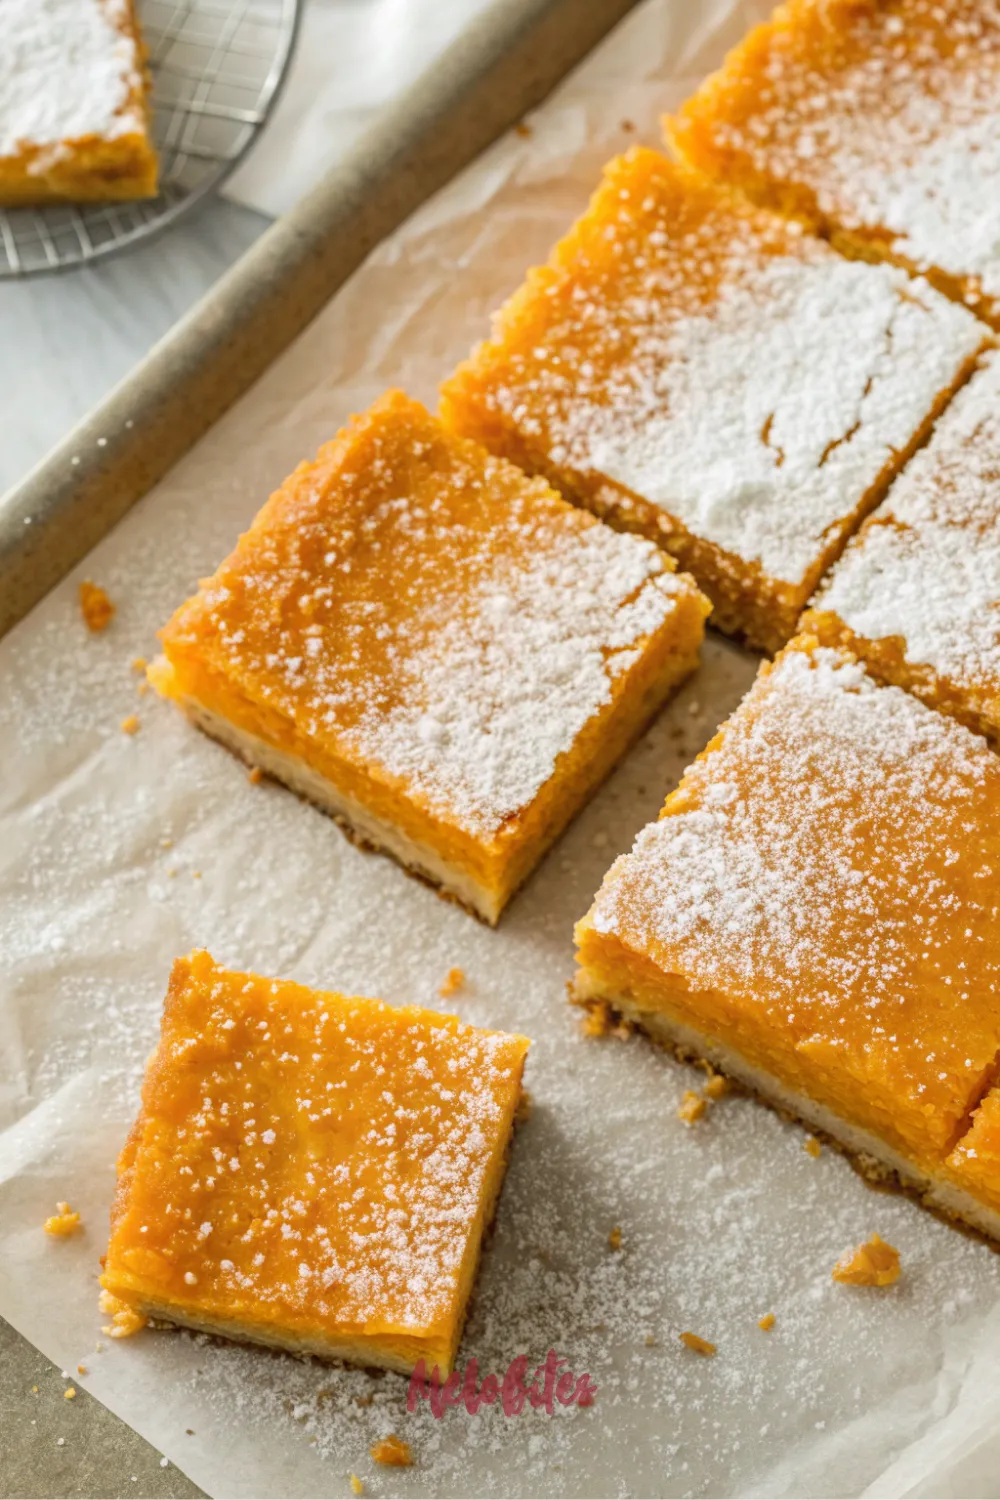
What if you could have all that classic, creamy, spiced pumpkin pie flavor? But in a perfect, neat, easy-to-grab square? What if you could serve 24 people in 60 seconds?
My friends, welcome to your new holiday secret weapon. These Pumpkin Pie Bars are the answer to your potluck prayers, and they are about to make you the undeniable hero of any fall gathering.
The Genius of This Pumpkin Pie Bars Recipe
So, what makes this Pumpkin Pie Bars Recipe a total game-changer? It’s simple: we’re taking the two best parts of the experience and mashing them together.
We’re ditching the fussy, flaky, and often-disappointing traditional pastry. Instead, we’re building this dessert on a thick, buttery, and foolproof shortbread crust.
On top of that, we’re pouring the classic, creamy, perfectly-spiced pumpkin pie filling you know and love. It’s the soul of the pie, in a format that’s 100 times easier to make, serve, and devour.
The Ultimate Easy Thanksgiving Dessert for Your Fall Recipes Collection
Let’s be honest, making a traditional pie is… a project. All that chilling, rolling, crimping, and praying to the “soggy bottom” gods.
This, right here, is the easy Thanksgiving dessert you’ve been dreaming of. The crust is a “press-in” crust; you just mix the ingredients and pat it into the pan. It’s forgiving, it’s fast, and it’s a perfect addition to your book of go-to fall recipes.
You can make these a full day ahead, and they slice like a dream. No mess, no stress, no serving spoons. Just pure, delicious, grab-and-go holiday magic.
Why You Need This Creamy Pumpkin Pie Filling with Shortbread Crust
This is where the magic happens. We’re talking about the ultimate texture combination.
The base is a crisp, sandy, incredibly buttery shortbread crust that holds its own. It’s like a decadent butter cookie met your favorite pie.
Then, you get that thick layer of creamy pumpkin pie filling with shortbread crust baked right on top. It’s the perfect, rich, melt-in-your-mouth custard, and when you get a bite with both layers, it’s pure textural heaven.
Why You’ll Be Obsessed with These Pumpkin Pie Bars
I am not kidding when I say this recipe will change your holiday baking game forever. It’s a total upgrade.
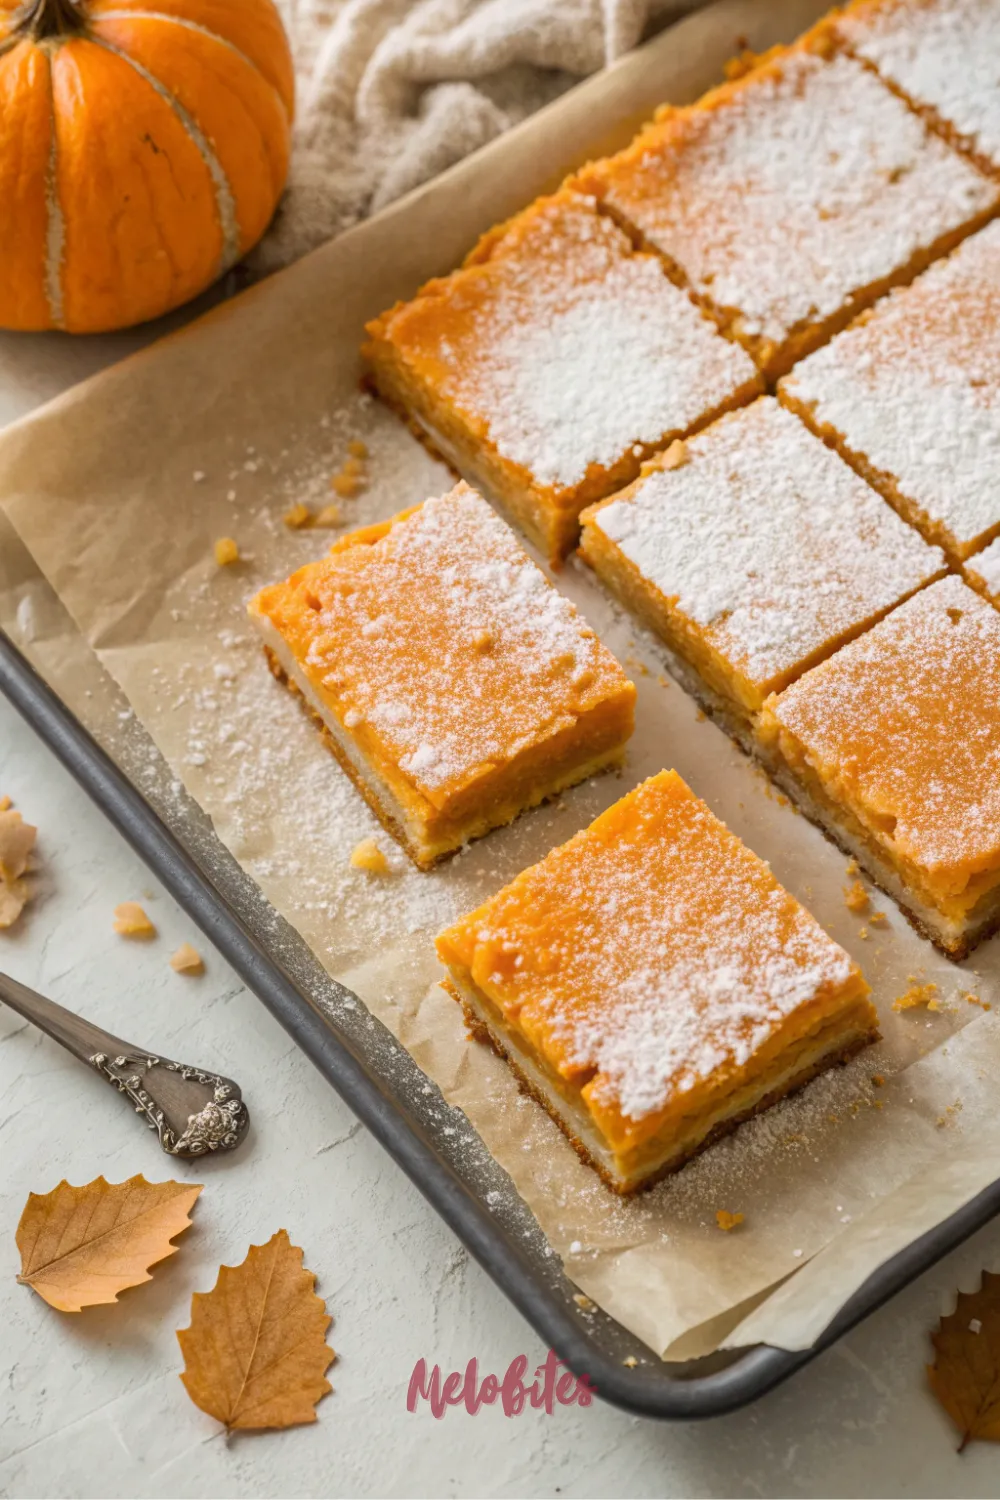
They Are Built for a Crowd One 9×13-inch pan can be cut into 16 generous squares or 24 smaller, party-sized bites. It’s the easiest way to serve a big group without making three separate pies.
The Crust is FOOLPROOF If you’ve ever cried over a pie crust that shrunk or tore, this one’s for you. It’s a 5-minute, one-bowl, press-in-the-pan situation. It’s impossible to mess up.
They Are SO Easy to Serve No pie server, no messy plates, no first-slice-disaster. You just slice them into squares and put them on a platter. They are the perfect, elegant, one-hand dessert for a party.
Make-Ahead Perfection These bars must be chilled to set up properly. This isn’t a suggestion; it’s a requirement! That makes them the perfect dessert to make a full day before your event, freeing up your oven and your sanity.
They Taste AMAZING This isn’t a “compromise” dessert. The buttery shortbread and the creamy, spiced filling are a flavor match made in heaven. Many (myself included) think this shortbread version is even better than the original.
Nutritional Benefits
Let’s be perfectly clear: this is a decadent holiday dessert. We are here to celebrate, and we are using butter and sugar!
But the wonderful thing about homemade dessert recipes is that you are in complete control. There are no weird preservatives or additives.
The star of the show, pumpkin, is a true superfood. It’s absolutely loaded with Vitamin A (which is amazing for your eyes) and is packed with fiber. The shortbread crust is made from simple, wholesome ingredients: butter, flour, and sugar.
It’s a real, honest-to-goodness treat. And because they’re in bars, portion control is a breeze… or you can just grab two. I support you either way.
Full Recipe: Easy Pumpkin Pie Bars
Prep Time: 25 minutes | Cook Time: 60-70 minutes | Chilling Time: 4 hours | Total Time: 5 hours 25 minutes | Yield: 16-24 bars | Category: Dessert | Method: Baking | Cuisine: American | Diet: N/A
Essential Ingredients for Pumpkin Pie Bars
For the Buttery Shortbread Crust:
- 2 cups all-purpose flour
- 1/2 cup granulated sugar
- 1/4 teaspoon kosher salt
- 1 cup (2 sticks) very cold unsalted butter, cut into small 1/2-inch cubes
For the Creamy Pumpkin Filling:
- 1 can (15 ounces) 100% pure pumpkin puree (NOT pumpkin pie filling)
- 1 can (12 ounces) evaporated milk
- 3/4 cup granulated sugar
- 1/4 cup packed dark brown sugar
- 3 large eggs
- 1 1/2 teaspoons ground cinnamon
- 1/2 teaspoon ground ginger
- 1/2 teaspoon ground nutmeg
- 1/4 teaspoon ground allspice (or cloves)
- 1/2 teaspoon kosher salt
- 1 teaspoon vanilla extract
Ingredients Notes
- Cold Butter: This is the most important part of the shortbread crust. Your butter MUST be cold, straight from the fridge. When those cold little butter pockets hit the hot oven, they create steam, which makes the crust tender and crisp, not tough.
- Pumpkin Puree: I will shout this from the rooftops: you must buy 100% Pure Pumpkin. Do NOT, under any circumstances, buy “Pumpkin Pie Filling” or “Pie Mix.” Pie filling is pre-sweetened and spiced, and it will completely ruin your recipe.
- Evaporated Milk: This is the key to that classic, creamy, firm-yet-silky pumpkin pie texture. Do not substitute it with Sweetened Condensed Milk (which is a totally different, sugary product) or regular milk (which is too thin).
- Sugars: I love using a mix of granulated and brown sugar in the filling. The brown sugar adds a lovely, deep, molasses-like flavor that pairs perfectly with the spices.
How to Make This Pumpkin Pie Bars Recipe
- Prep Your Oven and Pan: First, preheat your oven to 375°F (190°C). Take a 9×13-inch baking pan (a metal one is great) and line it with parchment paper, leaving a few inches of “overhang” on the two long sides. This overhang will act as “handles” to lift the entire block of bars out later.
- Make the Shortbread Crust: In a food processor, add the 2 cups of flour, 1/2 cup sugar, and salt. Pulse it a few times to combine.
- Add the Cold Butter: Scatter the cold, cubed butter over the flour mixture. Pulse the food processor 10-15 times, just until the mixture looks like coarse, damp, pea-sized crumbs. (No food processor? Use your fingers or a pastry cutter to rub the cold butter into the flour).
- Press the Crust: Dump these crumbs into your parchment-lined pan. Use your fingers and the flat bottom of a measuring cup to press the crumbs down into a firm, even layer.
- Blind Bake the Crust: This is the most important step for a crisp crust! Bake the crust at 375°F for 15-18 minutes. It should be dry, set, and just barely starting to turn golden at the edges.
- Make the Filling (While Crust Bakes): This is the easy part. In a large bowl, whisk together the pumpkin puree, evaporated milk, granulated sugar, brown sugar, eggs, all the spices, salt, and vanilla.
- Whisk it Good: Whisk until the filling is completely smooth, silky, and uniform in color. This takes about 1-2 minutes.
- Combine and Bake (Part 1): As soon as the crust comes out of the oven, while it is still hot, gently pour the pumpkin filling all over it. Smooth the top with a spatula.
- Bake (Part 2): Place the pan back into the 375°F oven and bake for 15 minutes.
- Reduce Heat and Finish: After 15 minutes, reduce the oven temperature to 350°F (175°C). Continue baking for another 40-50 minutes.
- The “Jiggle Test”: The bars are done when the edges are set and puffed, and the very center still has a slight wobble (like Jell-O). A knife inserted in the center should come out clean.
- Cool Completely (MANDATORY): This is the secret to perfect squares. Let the pan cool completely on a wire rack at room temperature (about 2 hours).
- Chill to Set: Cover the cooled pan with plastic wrap and transfer it to the refrigerator. Chill for at least 4 hours, or preferably overnight. Do not skip this step!
- Lift and Slice: Once fully chilled, use the parchment paper “handles” to lift the entire slab out of the pan and onto a cutting board. Use a large, sharp knife to cut into 16 or 24 squares.
Alternative Recipe: The “Next Level” Pecan Streusel Pumpkin Pie Bars
Do you love the classic, but want to make it just a little extra? Let’s add a crunchy, buttery, pecan-filled streusel on top. This is the amazing love child of a pumpkin pie and a pecan crisp.
Pecan Streusel Topping Ingredients:
- 3/4 cup all-purpose flour
- 1/2 cup packed dark brown sugar
- 1 teaspoon ground cinnamon
- 1/4 teaspoon kosher salt
- 6 tablespoons cold unsalted butter, cut into cubes
- 1 cup chopped pecans
How to Make the Alternative Version:
- Make the Crust: Follow steps 1-5 to make and blind-bake the shortbread crust.
- Make the Filling: Follow steps 6-7 to make the pumpkin pie filling.
- Make the Streusel: While the crust bakes, make the topping. In a medium bowl, whisk the flour, brown sugar, cinnamon, and salt. Add the cold, cubed butter.
- Crumble: Use your fingers to rub the butter into the flour mixture until you have large, coarse, crumbly pieces. Stir in the chopped pecans.
- Assemble and Bake: Pour the pumpkin filling over the hot, blind-baked crust. Sprinkle the pecan streusel mixture evenly all over the top of the filling.
- Bake: Bake at 375°F for 15 minutes.
- Reduce Heat and Finish: Reduce the oven to 350°F (175°C) and bake for another 45-55 minutes. The filling should be set (with a slight jiggle) and the streusel topping should be deep golden brown and fragrant.
- Cool and Chill: Follow the exact same cooling and chilling steps (12-14) as the main recipe. This version is also a dream to make ahead.
Storage Options
This is a custard dessert, which means it must be stored in the refrigerator.
Store the sliced bars in an airtight container in the fridge for up to 5 days. I like to put little squares of parchment paper between them if I’m stacking them, but they are usually gone long before that’s an issue.
These bars also freeze perfectly. Slice them into squares first. Place the squares on a baking sheet, not touching, and freeze for 1-2 hours until solid. Once solid, you can transfer them to a freezer-safe zip-top bag or an airtight container, with parchment between the layers. They will keep in the freezer for up to 3 months. To thaw, just place a square (or as many as you need) in the refrigerator overnight.
Variations and Substitutions
This recipe is incredibly forgiving and easy to adapt.
- Gluten-Free Version: This is an easy swap! Just use your favorite 1-to-1 gluten-free all-purpose flour blend (like Bob’s Red Mill) in the shortbread crust. The filling is already naturally gluten-free.
- Crust Swap: Don’t want shortbread? You can make a crust by crushing 2 sleeves of gingersnap cookies or graham crackers and mixing them with 1/2 cup of melted butter. Press that into the pan and bake for 10 minutes before adding the filling.
- Spice it Up: Feel free to play with the spices. Add 1/4 teaspoon of ground cardamom or a pinch of black pepper for a modern, spicy kick.
- Dairy-Free: You can make this dairy-free! Use a high-quality, stick-form vegan butter (cold!) for the crust. In the filling, use a can of full-fat coconut milk (the whole can) in place of the evaporated milk.
Practical & Valuable Tips
Tip 1: The Parchment Paper “Sling” is a Lifesaver. I’m serious, do not skip this. Lining the pan with parchment paper that sticks up on the sides is the only way to get the entire block of bars out in one piece. This guarantees you can place it on a cutting board and get those perfect, clean, professional-looking squares.
Tip 2: The Blind Bake is Not Optional. I know it’s an extra step. But it is the only way to guarantee a crisp, buttery shortbread crust. If you pour the wet filling onto the raw dough, the bottom will be a pale, soggy, and sad mess.
Tip 3: The Chill is Not a Suggestion. I’m saying this a third time because it’s the #1 rule for any custard bar. You cannot cut these warm. They will fall apart. The long, cold chill in the refrigerator is what sets the custard into a firm, dense, and perfectly sliceable bar.
Tip 4: For Ultra-Clean Slices… Use a Hot Knife. This is the professional baker’s secret. Once your bars are fully chilled, fill a tall glass with hot water. Dip a large, sharp knife into the water, wipe it dry with a paper towel, and make one clean cut. Repeat. Dip, wipe, cut. This melts the butter in the crust just enough to give you a flawless, smudge-free edge every time.
Frequently Asked Questions
- Can I just use a store-bought pie crust? You could press two store-bought, roll-out crusts into the bottom, but I strongly advise against it. It won’t have the right texture. The shortbread crust is what makes these bars and not just a “flat pie.” It’s also 100 times easier!
- Why did my filling crack on top? This is almost always from over-baking. You cooked it just a few minutes too long, and the eggs set too hard. Remember to pull it from the oven when that center still has a slight wobble.
- My crust was soggy! What happened? You didn’t blind-bake it long enough (or at all). That crust needs 15-18 minutes in the oven by itself to get crisp and form a seal before the wet filling goes in.
- Can I make these in an 8×8 or 9×9 pan? You can, but the bars will be very thick, and the baking time will be much longer. I would recommend cutting all the ingredients (crust and filling) in half for a 9×9 pan.
- I bought pumpkin pie filling by accident. Can I still use it? No, please don’t! That can is already full of sugar and spices. This recipe is designed for “100% Pure Pumpkin” puree. Using the filling will make your bars overly sweet, and the texture will be completely wrong.
So there you have it! This is the ultimate Pumpkin Pie Bars Recipe for a crowd.
It’s the perfect, stress-free easy Thanksgiving dessert that delivers all the classic flavor in a simple, portable, and delicious package.
If you make these bars, you’re going to be the hero of your holiday. I’d be so thrilled if you’d snap a photo and save this recipe to your “Fall Recipes” or “Holiday Baking” board on Pinterest!


Leave a Comment