
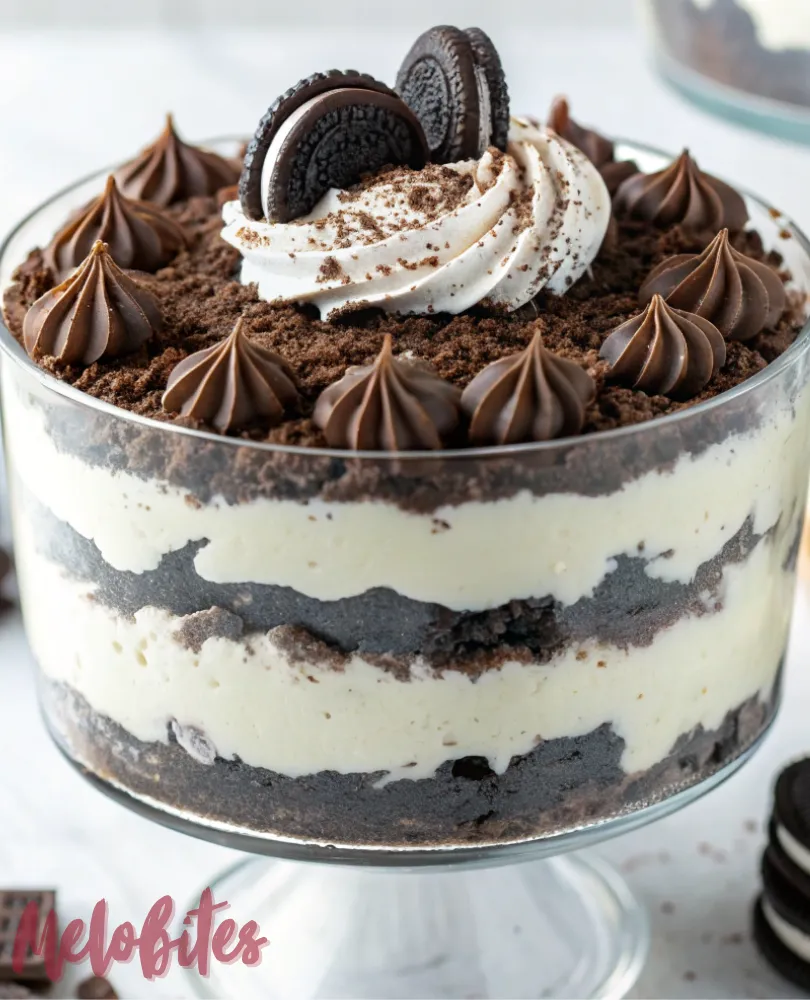
Is there anything better than having a show-stopping, jaw-droppingly delicious dessert recipe in your back pocket that requires absolutely zero baking? Imagine a dessert so impressive that everyone asks for the recipe, yet so easy you can whip it up on a whim. If that sounds like a dream, then get ready for that dream to come true.
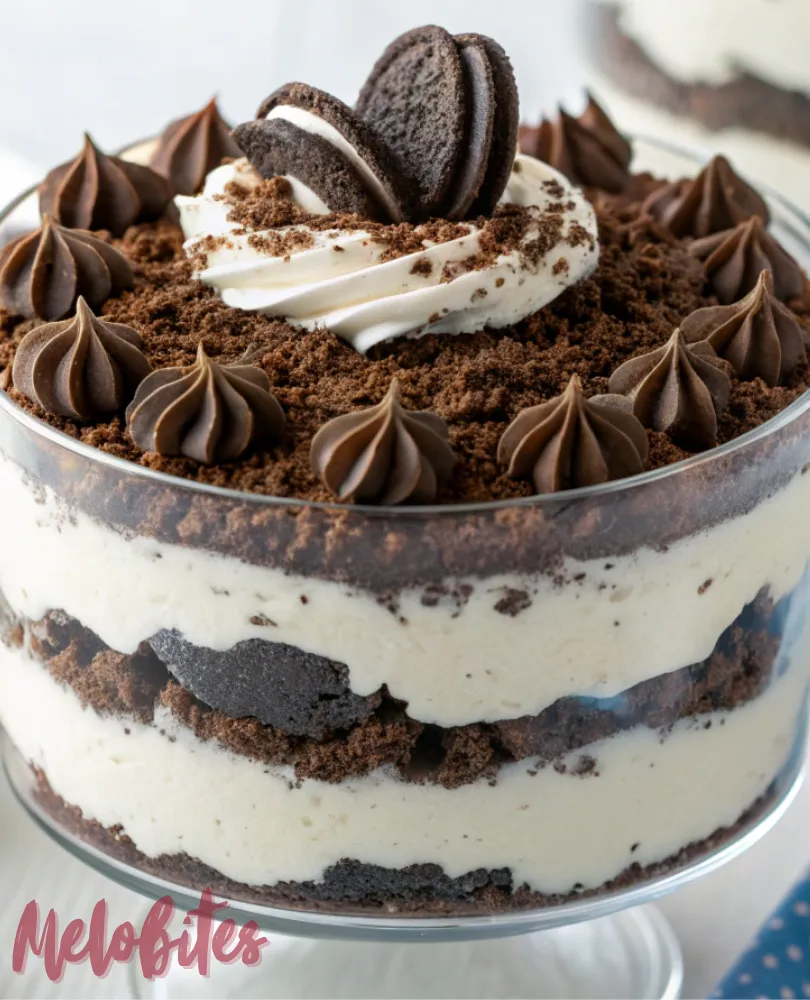
This no-bake cheesecake Oreo recipe is the ultimate solution for Oreo lovers, cheesecake fanatics, and anyone who wants to create an incredible dessert without ever turning on their oven. We’re talking about a crunchy, chocolatey Oreo crust that holds a cloud-like, creamy, and tangy cheesecake filling studded with even more Oreo pieces. It’s a cookies-and-cream masterpiece that looks elegant but is secretly, wonderfully simple.
So, put away your oven mitts and get ready for the creamiest, crunchiest, and most effortless dessert you’ll ever make. This is your new go-to for parties, potlucks, or any day that calls for a slice of pure, unadulterated joy. Let’s build this delicious dream together.
The Magic of a Perfect No-Bake Oreo Cheesecake
The absolute magic of a no-bake Oreo cheesecake lies in its beautiful simplicity and its incredible textural contrast. It all begins with a firm, buttery crust made from crushed whole Oreos, providing a deep chocolate flavor and a satisfying crunch in every single bite. This isn’t just a base; it’s the perfect, rugged foundation for the creamy bliss that sits on top.
Floating above that crunchy crust is a light, airy, and velvety cheesecake filling. Unlike dense, heavy baked cheesecakes, this no-bake version is ethereally smooth and melts in your mouth. The combination of the crisp crust with the silky filling creates a dessert symphony where every component plays its part to perfection.
The Creamy Oreo Dessert That Defines Easy No-Bake Recipes
When you explore the world of easy no-bake recipes, you’re looking for maximum impact with minimum effort, and this creamy Oreo dessert is the gold standard. The filling achieves its luscious, mousse-like consistency from a simple blend of softened cream cheese, whipped topping, and a touch of sugar. It’s a fool-proof formula that delivers a light yet decadent result every single time.
This recipe proves that you don’t need eggs, water baths, or the fear of a cracked cheesecake top to create a stunning dessert. The refrigerator does all the hard work for you, firming up the filling into a sliceable, stable texture. It’s the kind of effortless elegance that makes you look like a pastry chef, even if you’re a complete beginner.
Your Secret Weapon: The Best Make-Ahead Oreo Dessert for Parties
Every host needs a secret weapon, and this is the best make-ahead Oreo dessert for parties you will ever find. The true beauty of this recipe is that it’s not just possible to make it in advance; it’s actually better when you do. The chilling time is essential for the flavors to meld and for the cheesecake to set to the perfect consistency.
Imagine the freedom of having your dessert completely finished a full day before your guests arrive. There’s no last-minute baking, no countertop clutter, and no stress when it’s time to serve. This recipe is a gift to your future self, allowing you to enjoy your own party with the confidence that an amazing dessert is waiting in the wings.
Why You’ll Love This No-Bake Cheesecake Oreo Recipe
- Absolutely No Oven Required: Keep your kitchen cool and your energy bill low with this completely no-bake masterpiece, perfect for any time of year.
- Incredibly Easy to Assemble: With a simple press-in crust and a mix-and-chill filling, this dessert is practically fool-proof.
- The Ultimate Crowd-Pleaser: The classic cookies-and-cream flavor is a guaranteed hit with kids and adults alike, making it perfect for any occasion.
- Make-Ahead Perfection: Assemble it a day or two in advance to make party planning an absolute breeze and allow the flavors to deepen.
- Looks Like a Million Bucks: Despite its simplicity, this dessert has a stunning, elegant presentation that will impress everyone.
The Unseen Benefits of a No-Bake Dessert
While we don’t count calories in a dessert this dreamy, the real benefits are measured in peace of mind. This is a stress-free dessert, a recipe designed to eliminate the anxiety that can sometimes come with baking for a crowd. There’s no risk of cracks, no worrying about it being undercooked, and no complicated steps to mess up.
Think of this as an investment in effortless entertaining. The time you save and the confidence you gain are the hidden, priceless ingredients. It’s a delicious path to becoming a more relaxed and joyful host.
Full Recipe: No-Bake Cheesecake Oreo Dream
Prep Time: 20 minutes • Chill Time: 6 hours • Total Time: 6 hours 20 minutes • Yield: 12 servings • Category: Dessert • Method: No-Bake • Cuisine: American • Diet: Vegetarian
Essential Ingredients for the Oreo Dream
For the Oreo Crust:
- 1 package (14.3 oz / 405g) Regular Oreos
- 6 tablespoons (85g) Unsalted Butter, melted
For the Creamy Cheesecake Filling:
- 16 oz (452g) Full-Fat Cream Cheese, softened to room temperature
- 1 cup (120g) Powdered Sugar
- 1 teaspoon Vanilla Extract
- 1 container (16 oz / 453g) Frozen Whipped Topping (like Cool Whip), thawed
- 15 Oreos, roughly chopped or broken
Ingredient Notes
- Whole Oreos: For the crust, use the entire Oreo cookie, creme filling and all! The filling helps bind the crust together and adds a wonderful flavor.
- Full-Fat Cream Cheese: This is non-negotiable. Low-fat or whipped cream cheese has a higher water content and will not set up properly, resulting in a soupy filling.
- Thawed Whipped Topping: Make sure your whipped topping is fully thawed in the refrigerator before you begin. This ensures it will fold into the cream cheese mixture smoothly and create a light, airy texture.
How to Make the No-Bake Cheesecake Oreo Dream
- Create the Oreo Crust: Place the entire package of Oreos into a food processor and pulse until they become fine crumbs. Drizzle in the melted butter and pulse again until the crumbs are evenly moistened, resembling wet sand.
- Press the Crust: Firmly press the crumb mixture into the bottom and slightly up the sides of a 9-inch springform pan. Use the bottom of a glass or measuring cup to pack it down tightly. Place the crust in the freezer to firm up while you make the filling.
- Whip Up the Cheesecake Filling: In a large bowl, using an electric hand mixer or a stand mixer, beat the softened cream cheese on medium speed until it’s completely smooth and free of lumps. Beat in the powdered sugar and vanilla extract until well combined.
- Fold and Assemble: Gently fold the thawed whipped topping into the cream cheese mixture until no streaks remain. Carefully fold in the 15 chopped Oreos.
- Assemble Your Masterpiece: Remove the crust from the freezer and spread the cheesecake filling evenly over the top. Use an offset spatula to create a smooth, level surface.
- Chill for Perfection: Cover the cheesecake with plastic wrap and refrigerate for at least 6-8 hours, or preferably overnight. This chilling time is essential for the cheesecake to set up firmly. When ready to serve, run a knife around the edge before releasing the springform pan collar.
A Golden Twist: The White Chocolate Golden Oreo Dream
For those who prefer a vanilla-kissed dessert or simply want to try something new, this golden Oreo and white chocolate version is an absolute show-stopper. It swaps the deep chocolate flavor for a sweet, creamy, and buttery profile that is equally addictive. It’s a bright and sunny take on the classic dark original.
Follow the main recipe for the No-Bake Cheesecake Dream, but make these simple, game-changing swaps.
- For the Crust: Use one package of Golden Oreos instead of the classic chocolate ones.
- For the Filling: Add one 3.4 oz box of white chocolate instant pudding mix to the cream cheese along with the powdered sugar. This will add flavor and help stabilize the filling.
- For an Extra Surprise: Gently fold in 1 cup of white chocolate chips or chopped white chocolate along with the chopped Golden Oreos for an extra layer of decadence.
Storage Options
This dessert is a fantastic keeper. Cover any leftovers with plastic wrap or store them in an airtight container in the refrigerator for up to 5 days. You can also freeze the entire cheesecake or individual slices. To freeze, place it uncovered in the freezer until firm, then wrap it tightly in plastic wrap and aluminum foil for up to 3 months.
Variations and Substitutions
The beauty of this recipe is its versatility. Try using Mint Oreos and adding a drop of peppermint extract to the filling for a mint-chocolate version. For a peanut butter twist, use Peanut Butter Oreos and swirl in some melted peanut butter on top. You can also top the finished cheesecake with a rich chocolate ganache, caramel sauce, or fresh berries.
Practical & Valuable Tips
- Room Temperature is Key: Your cream cheese absolutely must be softened to room temperature. Cold cream cheese will result in a lumpy, unpleasant filling that no amount of mixing can save.
- Don’t Under-Chill: Be patient! The 6-8 hour chilling time is not a suggestion; it’s a requirement. This is what allows the cheesecake to firm up into clean, beautiful, sliceable wedges.
- Use a Springform Pan: While not strictly necessary, a springform pan makes releasing and serving the cheesecake incredibly easy and ensures a professional-looking presentation.
Frequently Asked Questions
- Why didn’t my no-bake cheesecake set up properly? The most common culprits are using low-fat cream cheese or not chilling the dessert long enough. Full-fat ingredients and adequate chilling time are essential for the structure.
- Can I use homemade whipped cream instead of Cool Whip? Yes, but you will need to stabilize it. Whip 2 cups of heavy cream with 1/2 cup of powdered sugar and 1 teaspoon of vanilla until stiff peaks form. The result will be slightly less stable than with Cool Whip, so be sure to chill it overnight.
- My cream cheese filling is lumpy. How can I fix it? Lumps happen when the cream cheese is too cold. Unfortunately, once the whipped topping is folded in, it’s difficult to fix. The best solution is prevention: make sure your cream cheese is very soft before you start mixing.
- Can I make this dessert in a regular 9-inch pie dish? Absolutely! The presentation will be different, but it will taste just as delicious. Simply press the crust into the pie dish and add the filling; you just won’t be able to remove it from the pan for serving.
- How do I get clean, perfect slices? For photo-worthy slices, use a long, sharp knife. Dip the knife in hot water and wipe it clean between each and every cut. This melts any residue off the blade and prevents dragging.
This No-Bake Cheesecake Oreo Dream is proof that you don’t need an oven to create a truly spectacular and memorable dessert.
Ready to become a no-bake legend? Pin this incredible Oreo dessert recipe to your favorite party board on Pinterest and prepare for a standing ovation at your next gathering!







Leave a Comment