
Have you ever encountered a cake so visually striking and so utterly delicious that it feels like a dream? A dessert with a rich, velvety texture, a beautiful and vibrant crimson color, and a tangy, sweet frosting that is simply irresistible. It is a true showstopper that always commands attention.
That, my friends, is the magic of a perfect Red Velvet Cake. It’s a classic for a reason, offering a unique and subtle cocoa flavor that is perfectly complemented by the creamy tang of a cream cheese frosting. It is a cake that is as delightful to look at as it is to eat.
Today, we are diving into the recipe for a Decadent Red Velvet Birthday Cake with Cream Cheese Frosting. This guide will show you the simple secrets to achieving that signature velvety texture and vibrant color, all while creating a cake that tastes absolutely divine. Get ready to bake a cake that is sure to impress at any celebration.
The Ultimate Showstopper: Red Velvet Birthday Cake Recipe
This Red Velvet Birthday Cake Recipe is the perfect way to celebrate any special occasion in style. The cake itself boasts a wonderfully moist and tender crumb with a subtle and intriguing cocoa flavor, all brought to life with its signature vibrant red hue. The smooth and tangy cream cheese frosting is the quintessential partner, creating a balanced and utterly decadent dessert.
A Perfect Festive Cake Idea for Special Occasions and Unique Flavors
You will find that this is the perfect festive cake idea for birthdays, holidays, or any event where you want to make a statement. Its unique red color and sophisticated flavor profile set it apart from more traditional cakes. This recipe is also a fantastic way to explore unique flavors in baking, as the subtle cocoa and tanginess of the buttermilk create something truly special.
Your Guide: What Makes Red Velvet Cake So Velvety?
For anyone wondering what makes red velvet cake so velvety, the answer lies in the combination of a few key ingredients and their interactions. The buttermilk and vinegar in the batter help to tenderize the gluten in the flour, resulting in that signature soft and velvety crumb. The small amount of cocoa powder provides a subtle chocolate flavor without drying the cake out, and the oil contributes to its moistness. The chemical reaction between the cocoa powder (an acid) and the baking soda (a base) also helps to create a light and airy texture.
Why You’ll Love This Red Velvet Cake
You are going to love this recipe because it delivers a perfectly moist, tender, and vibrantly colored red velvet cake that tastes absolutely incredible. You’ll also adore the smooth, tangy, and sweet cream cheese frosting that is the ideal complement to the subtle cocoa flavor of the cake. Plus, it’s a stunning and impressive cake that is sure to be the star of any birthday celebration.
Nutritional Benefits
While this is undoubtedly a celebratory and indulgent cake, making it from scratch allows you to control the quality of the ingredients. You get to use real butter, fresh cream cheese, and good quality cocoa powder. The buttermilk in the recipe also contributes a bit of protein and calcium. Sharing a beautiful, homemade cake that you have baked with love is one of the best and most joyful ways to celebrate life’s special moments with those you care about.
Full Recipe
Are you ready to create a truly stunning and unforgettable birthday cake? This detailed guide will walk you through every simple step, from creating the moist, red-hued cake layers to whipping up the perfect tangy cream cheese frosting. Get ready to master the art of the classic and decadent Red Velvet Cake.
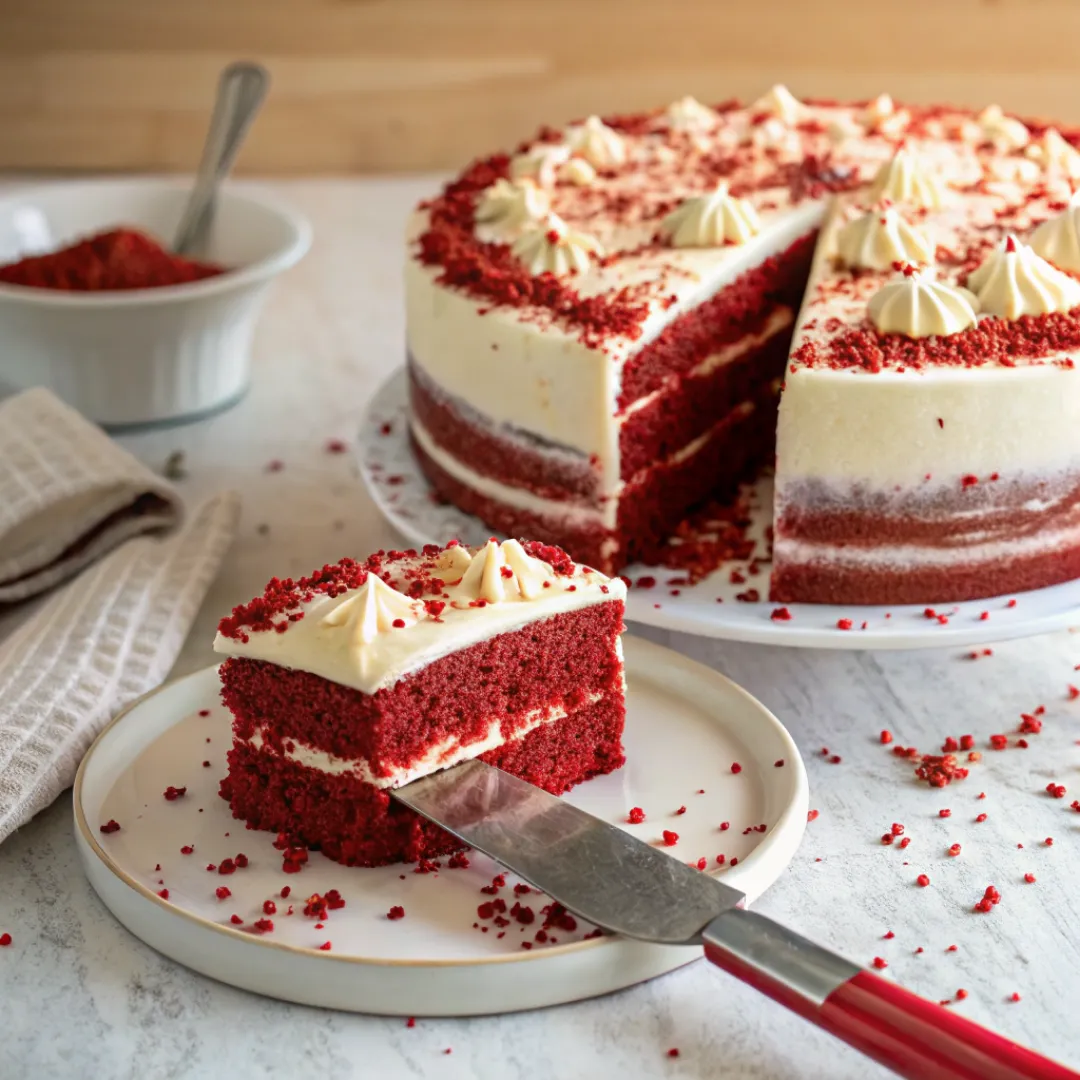
Celebrate in style with this stunning red velvet birthday cake. It has a classic mild cocoa flavor, a vibrant red hue, and a tangy cream cheese frosting that’s simply irresistible. A true showstopper for any party.
Prep Time: 30 minutes | Cook Time: 30 minutes | Total Time: 1 hour | Yield: 12-16 servings | Category: Dessert, Cake | Method: Baking | Cuisine: American | Diet: N/A
Essential Ingredients for Red Velvet Birthday Cake
This classic and decadent cake comes together with a handful of key baking ingredients that create its signature texture and flavor.
- For the Decadent Red Velvet Cake:
- 2 ½ cups all-purpose flour
- 2 tablespoons unsweetened cocoa powder
- 1 teaspoon baking soda
- 1 teaspoon salt
- 1 cup (2 sticks) unsalted butter, softened
- 1 ¾ cups granulated sugar
- 2 large eggs, at room temperature
- 1 teaspoon pure vanilla extract
- 1 teaspoon white vinegar
- 1 cup buttermilk, at room temperature
- 1-2 tablespoons red food coloring (gel food coloring recommended)
- For the Tangy Cream Cheese Frosting:
- 8 ounces (225g) full-fat cream cheese, softened
- ½ cup (1 stick) unsalted butter, softened
- 3-4 cups powdered sugar, sifted
- 1 teaspoon pure vanilla extract
Ingredients Notes
A little more detail on our key ingredients will ensure your red velvet cake is a spectacular success.
- The Red Food Coloring: For the most vibrant and classic red hue, it is highly recommended to use a good quality gel food coloring. Liquid food coloring can sometimes require a larger amount to achieve the desired color, which can potentially affect the cake’s texture. Start with 1 tablespoon and add more gradually until you reach your preferred shade of red.
- The Buttermilk and Vinegar: The combination of buttermilk and white vinegar is crucial for achieving the tender and velvety crumb that is characteristic of red velvet cake. They react with the baking soda to create leavening and also help to tenderize the gluten in the flour. It is important that your buttermilk is at room temperature.
- The Cream Cheese Frosting: For a smooth and lump-free frosting, it is essential that both your cream cheese and butter are fully softened to room temperature before you begin. Using full-fat cream cheese will also result in a richer and more stable frosting. Sifting the powdered sugar will help to prevent any lumps and create a silky smooth texture.
How to Make a True Showstopper
Let’s walk through the simple steps to create this stunning and delicious celebration cake.
- Step 1: Prepare Your Oven and Cake Pans. First, preheat your oven to 175°C (350°F). Grease and flour two 9-inch round cake pans.
- Step 2: Combine the Dry Ingredients. In a medium bowl, whisk together the flour, cocoa powder, baking soda, and salt. Set aside.
- Step 3: Cream the Butter and Sugar. In a large mixing bowl, use an electric mixer to beat the softened butter and the granulated sugar together until the mixture is very light and fluffy, about 3-5 minutes.
- Step 4: Add the Wet Ingredients. Beat in the eggs one at a time, followed by the pure vanilla extract. In a small bowl, whisk together the buttermilk, red food coloring, and white vinegar.
- Step 5: Alternate Dry and Wet Ingredients. On low speed, gradually add the dry ingredients to the wet ingredients, alternating with the buttermilk mixture, beginning and ending with the dry ingredients. Mix just until everything is combined; be careful not to overmix.
- Step 6: Bake the Cake Layers. Divide the vibrant red batter evenly between your two prepared cake pans. Bake for 25 to 30 minutes, or until a toothpick inserted into the center comes out clean. Let the cakes cool in the pans for about 10 minutes before inverting them onto a wire rack to cool completely.
- Step 7: Make the Tangy Cream Cheese Frosting. While the cakes are cooling, prepare your frosting. In a large bowl, use an electric mixer to beat the softened cream cheese and butter together until smooth and creamy. Gradually beat in the sifted powdered sugar, one cup at a time, until it is fully incorporated and the frosting reaches your desired consistency. Beat in the vanilla extract until it is light and fluffy.
- Step 8: Assemble and Frost the Cake. Once the cake layers are completely cool, place one layer on your serving plate or cake stand. Spread a generous amount of the cream cheese frosting evenly over the top. Carefully place the second cake layer on top, and then use the remaining frosting to cover the top and sides of the entire cake.
Storage Options
This decadent red velvet cake with cream cheese frosting should be stored in an airtight container in the refrigerator due to the perishable nature of the cream cheese frosting. It will stay moist and delicious for up to 4-5 days. It is best to let the cake sit at room temperature for about 30 minutes before serving to allow the frosting to soften slightly for the best texture.
Variations and Substitutions
While the classic red velvet with cream cheese is iconic, you can explore a few fun variations. For a chocolate boost, you can add a tablespoon of melted dark chocolate to the cake batter. You can also try a different type of frosting, such as a classic French buttercream or an ermine frosting, which has a unique, less sweet flavor.
Practical & Valuable Tips
For the most vibrant red color, use a good quality gel food coloring. Be careful not to overmix the cake batter once the flour is added to ensure a tender crumb. Always make sure your cake layers are completely cool before frosting to prevent the cream cheese frosting from melting and sliding off the cake.
Frequently Asked Questions
- Can I make the cake layers ahead of time? Yes, absolutely! You can bake the cake layers up to two days in advance. Just let them cool completely, then wrap them tightly in plastic wrap and store them in the refrigerator until you are ready to assemble and frost the cake.
- Why is it called red velvet cake? The name likely comes from the cake’s soft, velvety texture and its reddish-brown hue, which historically was a result of the reaction between the cocoa powder and an acidic ingredient like buttermilk or vinegar. Modern recipes often use red food coloring to enhance the color.
- Can I use liquid food coloring instead of gel? Yes, you can, but you will likely need to use a larger quantity to achieve the same vibrant color as with gel food coloring. This extra liquid can sometimes slightly affect the cake’s texture.
- Can I freeze red velvet cake? Yes, you can freeze both the unfrosted cake layers (wrapped tightly in plastic wrap and foil) and individual slices of the finished, frosted cake. Thaw them in the refrigerator overnight before serving.
- My cream cheese frosting is too soft. How can I fix it? If your cream cheese frosting is too soft, try refrigerating it for about 30 minutes to an hour to firm up. If it is still too soft after chilling, you can try beating in a little more sifted powdered sugar, a tablespoon at a time, until it reaches your desired consistency.
Conclusion
This Decadent Red Velvet Birthday Cake with Cream Cheese Frosting is a true celebration centerpiece that is as beautiful to look at as it is to eat. Its unique flavor profile and stunning crimson hue make it a standout dessert for any special occasion. It is a surprisingly easy cake to make from scratch, and the resulting moist, velvety texture and tangy frosting are simply irresistible. A true showstopper for any party! If you love this classic and elegant cake, don’t forget to share the recipe and pin it to your favorite cake recipes board on Pinterest!


Leave a Comment