
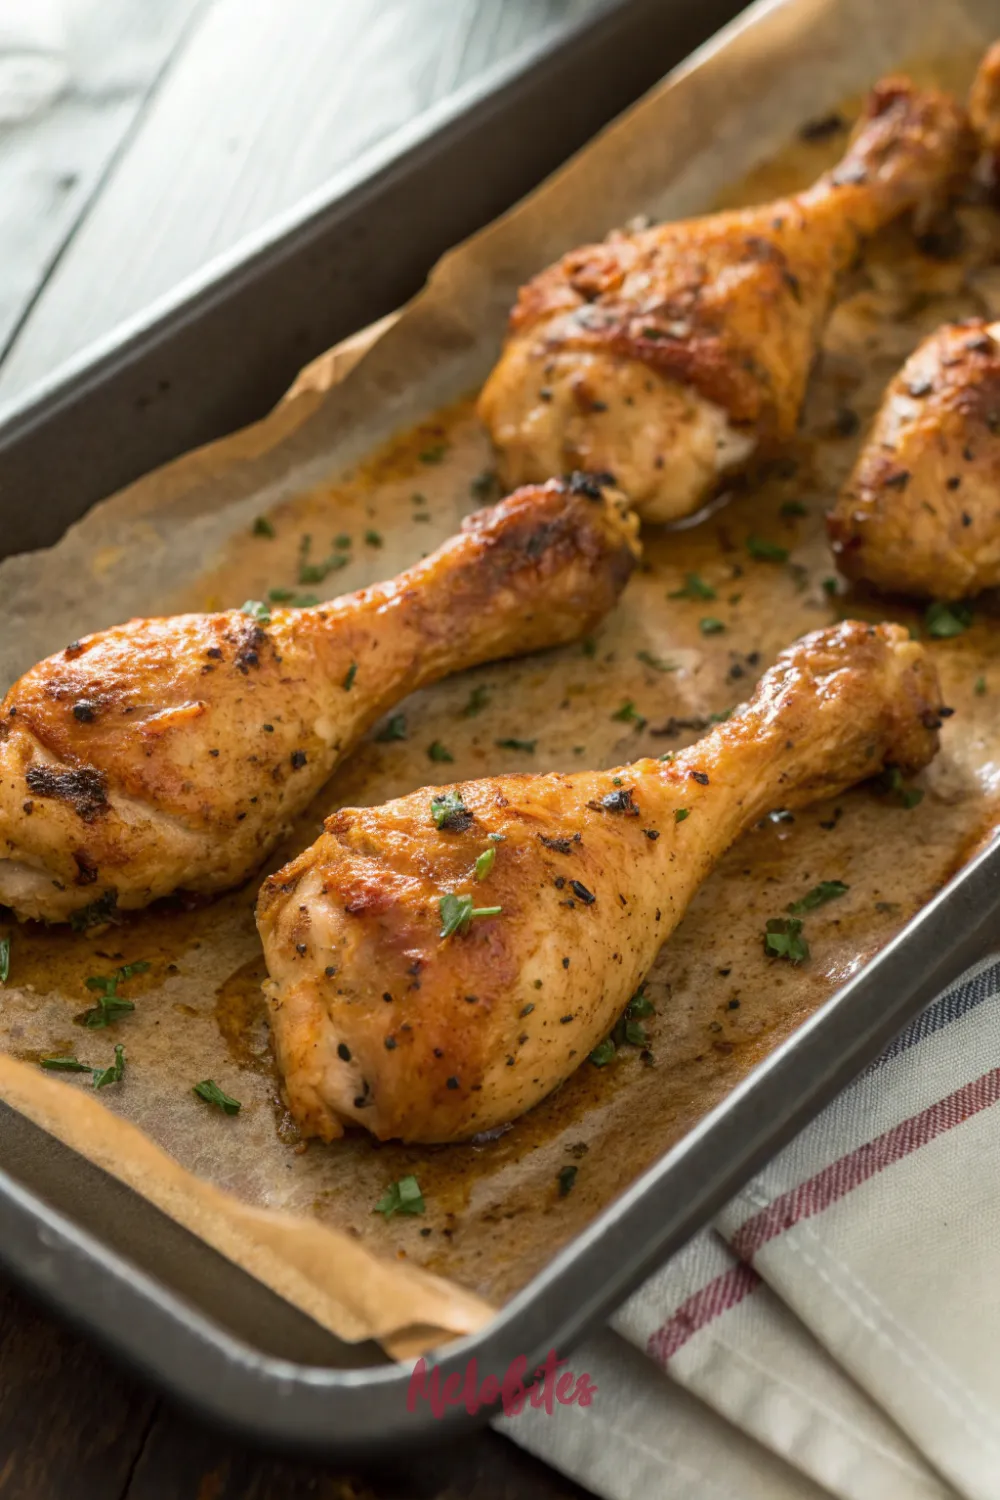
Let’s talk about the humble chicken leg. It’s the hero of the budget-friendly family meal. It’s what kids actually want to eat, and it’s what our wallets love to buy.
But let’s be brutally honest for a second. What’s the one, major, consistent disappointment with baking chicken legs at home? The skin.
It’s that pale, flabby, rubbery, sad excuse for a coating that you just end up peeling off. It’s the difference between a “meh” dinner and a “wow” dinner. You want that shatteringly crisp, golden-brown, salty, savory crust that you get from frying, but you want the ease and health of baking.
What if I told you the secret to a perfect, crispy-skinned baked chicken leg is sitting in your pantry right now? It’s not a special pan. It’s not some complicated technique. It’s a simple, foolproof method that will change your chicken game forever.
I’m serious. This is the last recipe you’ll ever need for this. Say goodbye to soggy-skin-syndrome.
The Only Chicken Legs in the Oven Recipe You’ll Ever Need
This is, at its core, a foundational Chicken Legs in the Oven Recipe. It’s the kind of recipe that should be in every home cook’s playbook. It’s reliable, it’s fast, and it works 100% of the time.
This isn’t about a fancy glaze or a complicated sauce (though we can talk about those later). This is about perfecting the vessel. It’s about making the chicken leg itself the star of the show, with a skin so crisp you can hear the crunch from across the table.
Your New Favorite Easy Chicken Recipe for Crispy Baked Chicken Legs
The goal is simple: Crispy Baked Chicken Legs. The problem is simple: moisture. Moisture is the mortal enemy of crispiness.
To get that “fried” texture in an oven, we have to do two things. First, we have to get rid of the moisture on the outside of the skin. Second, we have to render the fat underneath the skin.
This Easy Chicken Recipe tackles both. It’s a simple, two-part strategy that turns your oven into a high-heat convection “fryer.” It’s a technique that, once you learn it, you’ll use on everything.
How to Get Crispy Skin on Chicken in Oven (The Real Secret)
So, you want to know how to get crispy skin on chicken in oven? Here’s the answer. It’s a combination of a secret ingredient and the right setup.
The secret ingredient? Baking powder. Yes, the stuff you use for pancakes.
It is not the same as baking soda (do NOT mix them up!). Baking powder is a scientific miracle. It does two things: it raises the pH level of the chicken skin, allowing it to brown better, and it combines with the chicken’s natural moisture, forming carbon dioxide bubbles that create a light, bubbly, super-crisp texture when baked.
It’s a dry brine that chemically changes the skin. When you combine this with a wire rack and high heat, you get magic. You get the crispiest chicken legs of your life.
Why You’ll Be Obsessed With This Recipe
You’re going to make this once and it’ll instantly become part of your weekly rotation. First, it’s unbelievably budget-friendly. Chicken legs (drumsticks and thighs) are consistently the most affordable cuts of chicken at the store.
Second, it’s family-friendly. Kids love eating with their hands, and this is the perfect, no-fuss main course. The flavor is savory and smoky, not “weird” or “spicy” (unless you want it to be).
Third, the cleanup is a breeze. Line your baking sheet with foil, and you’ll have almost nothing to scrub. It’s a one-pan (plus one bowl) wonder.
And finally, the crunch. I can’t overstate this. The payoff of biting through that shattering skin into the juicy, tender dark meat is just… well, it’s everything.
A High-Protein, Low-Fuss Nutritional Win
Let’s talk about what you’re getting here. This is a fantastic high-protein meal. Chicken legs, and dark meat in general, are not just protein. They are also packed with iron and zinc, which are essential for energy.
And because we are baking (or, more accurately, roasting), we aren’t adding any of the junk from deep-frying. The fat renders and drips away from the chicken. This makes it a perfect, satisfying meal for anyone living a low-carb or keto-friendly lifestyle.
The Main Event: Full Chicken Legs in the Oven Recipe
Prep Time: 10 minutes | Cook Time: 40-45 minutes | Total Time: 50-55 minutes | Yield: 4-6 servings | Category: Main Course, Dinner | Method: Baking, Roasting | Cuisine: American | Diet: Gluten-Free, Low-Carb, Keto
The “Crispy Skin” Arsenal: Essential Ingredients
- 3-4 lbs bone-in, skin-on chicken legs (a mix of drumsticks and thighs is perfect)
- 1 tablespoon neutral oil (like avocado, canola, or vegetable oil)
- 1 tablespoon baking powder (make sure it’s aluminum-free and NOT baking soda)
- 2 teaspoons smoked paprika
- 2 teaspoons garlic powder
- 1 teaspoon onion powder
- 1 1/2 teaspoons kosher salt
- 1 teaspoon black pepper
A Few Quick Notes on Your Ingredients
- The Chicken: This recipe only works with bone-in, skin-on chicken. Boneless, skinless meat has nothing to crisp. This method is all about the skin.
- The Baking Powder: I’m saying this a third time because it is critical. Do NOT use baking soda. Baking soda is a base. It will not crisp the chicken; it will just make it taste metallic and soapy. You must use double-acting baking powder.
- The Smoked Paprika: This is another key. Regular paprika is fine, but smoked paprika gives the chicken a gorgeous, deep-red color and a smoky, “just came off the grill” flavor.
- The Oil: We’re just using a tiny bit to help the spices stick and to jump-start the rendering process. You can also use melted unsalted butter.
Step-by-Step: How to Make The Crispiest Chicken Legs
- The #1 Most Important Step: DRY THE CHICKEN.
- Preheat your oven to 425°F (220°C).
- Place an oven-safe wire rack on top of a large, foil-lined baking sheet. (This is the “rack and tray” setup).
- Take your chicken legs out of the package.
- Use several paper towels to pat each piece BONE DRY.
- I mean it. Get into every crevice. The skin should feel dry, not tacky.
- Make the Magic Rub:
- In a small bowl, whisk together the baking powder, smoked paprika, garlic powder, onion powder, salt, and pepper.
- This is your “crispy dust.”
- Season the Chicken:
- Place your dry chicken pieces in a large mixing bowl.
- Drizzle the 1 tablespoon of oil over the chicken and toss to lightly coat each piece.
- Sprinkle the magic rub all over the chicken.
- Use your hands to toss and rub the seasoning evenly onto every single piece.
- The “Patience” Step (Optional, but Recommended):
- For maximum crispiness, arrange the seasoned chicken on the wire rack.
- Place the whole rack and tray, uncovered, in the refrigerator for 30 minutes (or up to 4 hours).
- This “dry-brining” lets the baking powder work its magic and dries the skin out even more. .
- If you’re in a hurry, you can skip this. They will still be very crispy.
- Arrange for Success:
- Place the chicken pieces on the wire rack, making sure to leave space between each piece.
- Do not let them touch.
- Crowding the pan will create steam, and steam is the enemy.
- The High-Heat Roast:
- Place the entire baking sheet (with the rack) into the preheated 425°F oven.
- Bake for 40-45 minutes.
- You do not need to flip them.
- Check for Doneness:
- The chicken is done when the skin is a deep, golden brown and looks incredibly crisp.
- A digital thermometer inserted into the thickest part (avoiding the bone) should read at least 165°F (74°C).
- Pro-tip: For dark meat like legs and thighs, the texture is actually better at 175-185°F, as it breaks down more connective tissue.
- Rest the Meat:
- This is the final secret.
- Remove the pan from the oven and let the chicken rest on the rack for 5-10 minutes.
- This allows the juices to redistribute back into the meat, ensuring a juicy bite instead of a dry one.
- Serve hot and listen for the crunch.
Alternative Recipe: The “Crispy-Glazed” Hot Honey Chicken
Love this, but want a sticky, sweet, and spicy glaze? Here’s the problem: glazes are wet, and wet kills crisp. Here is how you get both.
Here’s What You’ll Need:
- 1 batch of your chicken (cooked 80% of the way)
- For the Hot Honey Glaze:
- 1/4 cup honey (or maple syrup)
- 2 tablespoons Sriracha (or your favorite hot sauce)
- 1 tablespoon melted butter
- 1 tablespoon soy sauce (or tamari)
How to Make It (The “Glaze and Blast” Method):
- Follow the Main Recipe: Prepare and cook your chicken using the original crispy method.
- Cook 80% of the Way: Bake the chicken at 425°F for 30 minutes. The skin will be set and starting to crisp.
- Make the Glaze: While the chicken is baking, whisk together the honey, Sriracha, melted butter, and soy sauce in a small bowl.
- Brush and Blast:
- After 30 minutes, remove the chicken from the oven.
- Generously brush the glaze all over the tops and sides of the chicken pieces.
- The Final Cook:
- Return the pan to the oven and bake for another 10-12 minutes.
- The glaze will bubble, thicken, and caramelize onto the crispy skin.
- For an extra sticky char, you can turn the oven to BROIL for the last 1-2 minutes (but watch it like a hawk so it doesn’t burn!).
- Rest and Serve: Let it rest for 5 minutes before serving. You’ll have a sticky, sweet, spicy, and crispy skin.
Saving Your Crunch: Storage and Reheating
Leftover crispy chicken can be saved, but you have to be smart about it. The goal is to preserve the crispiness, not destroy it. Do not just throw it in a container.
- In the Refrigerator:
- Let the chicken cool completely to room temperature.
- Store it in an airtight container for 3-4 days.
- Be warned: The skin will get soft in the fridge. That’s okay. We can bring it back.
- How to Reheat (The Right Way):
- The #1 Best Method: The Air Fryer.
- An air fryer is a small convection oven.
- Place the cold chicken in the air fryer basket.
- Reheat at 375°F (190°C) for 5-8 minutes.
- The skin will re-crisp perfectly.
- The #2 Best Method: The Oven.
- Place the chicken on a wire rack and baking sheet (just like you cooked it).
- Pop it into a 400°F (200°C) oven for 10-15 minutes, or until hot and crispy.
- The “Do Not Ever” Method: The Microwave.
- Do not do it.
- The microwave will heat the chicken by steaming it from the inside out.
- You will be left with hot, wet, rubbery, and deeply depressing chicken skin.
- The #1 Best Method: The Air Fryer.
Make It Your Own: Variations and Substitutions
This recipe is a technique, not just a flavor. You can swap out the spices easily. Just keep the baking powder ratio the same (about 1 tbsp per 3-4 lbs of chicken).
- The Spice Rub:
- Lemon Pepper: Use 2 tablespoons of your favorite lemon pepper seasoning, 1 teaspoon garlic powder, and the baking powder.
- Cajun: Use 2-3 tablespoons of a salt-free Cajun or Creole blend, the baking powder, and salt to taste.
- Italian: Use 2 tablespoons of Italian seasoning, 1 teaspoon of red pepper flakes, the baking powder, and salt.
- The Heat: Add 1/2 to 1 teaspoon of cayenne pepper or chipotle powder to the main spice rub for a smoky, spicy kick.
- The Meat: This exact method works perfectly on whole chicken wings.
- The Fat: You can use 1-2 tablespoons of melted unsalted butter instead of oil for an even richer, more golden-brown skin.
My Top Practical & Valuable Tips for “Fail-Proof” Skin
I’ve made a lot of baked chicken. These are the rules I live by. Do not break them, and you will be rewarded.
- If You Think It’s Dry, Dry It More.
- I’m saying this one last time.
- If your paper towel is even slightly damp, you are not done.
- You want the skin to feel almost papery.
- This is the most important step.
- The Wire Rack is Non-Negotiable.
- If you place the chicken directly on the foil, what happens?
- The bottom of the chicken sits and boils in its own rendered fat and juices.
- You will have a crispy top and a completely soggy, gross bottom.
- The wire rack lets the hot air circulate 360 degrees, crisping all sides.
- Space is Your Friend. Steam is Your Enemy.
- Do not, under any circumstances, crowd the pan.
- If the chicken pieces are touching, they will trap moisture.
- That moisture turns to steam.
- Steam makes things soggy.
- Use two pans if you have to. It’s better than soggy chicken.
- The Fridge Rest is a “Pro” Move.
- The 30-minute (or more) rest in the fridge, uncovered, is a restaurant trick.
- The cold, dry air of the refrigerator acts like a dehydrator.
- It wicks away any remaining surface moisture.
- This step takes your skin from “crispy” to “shattering.”
- Trust the Dark Meat Temperature.
- We’ve all been trained to fear 165°F.
- That temperature is the minimum for safety.
- But dark meat (legs, thighs) has much more fat and connective tissue.
- It is better when cooked to a higher temp.
- At 175°F to 185°F, that tissue and fat melts, making the meat more tender and juicy, not less.
Your Crispy Chicken Questions, Answered
- I really don’t have a wire rack. What’s the next best thing?
- Okay, here’s a hack.
- Crumple up several sheets of aluminum foil into long “ropes.”
- Arrange these ropes on your baking sheet like a makeshift rack.
- Place the chicken on top of the foil ropes.
- This will elevate the chicken just enough to keep it out of the puddles of fat.
- Can I use baking soda? I’m out of baking powder.
- No. Please, no. I know I keep saying this, but it’s the most common mistake.
- Baking soda (sodium bicarbonate) is not the same as baking powder (which has an acid included).
- It will leave a soapy, chemical taste on your chicken.
- If you don’t have baking powder, just use the spices and salt. It will be less crispy, but still good.
- Will I taste the baking powder?
- Not at all.
- We are using 1 tablespoon for 3-4 pounds of chicken, and it’s mixed with a ton of other flavorful spices.
- You will not taste anything except delicious, savory, crispy chicken.
- Can I use this method on boneless, skinless thighs?
- You can use the spice rub and baking method, but the recipe is pointless.
- There is no skin to crisp.
- This entire recipe is designed for the skin.
- Why did my smoke alarm go off?
- Welcome to high-heat roasting!
- This usually happens if your chicken fat dripped onto the bottom of your oven.
- Make sure your foil-lined baking sheet is large enough to catch all the drips.
- A little smoke is normal as the fat renders, so turn on your exhaust fan.
This is it. This is the key. Your hunt for the perfect, crispy Chicken Legs in the Oven Recipe is officially over.
This is the technique that will make you a weeknight hero. If you loved this (and I know you will!), don’t keep this secret to yourself. Pin this recipe on Pinterest, share it with a friend who is tired of soggy chicken, and let’s make every dinner a crispy one.


Leave a Comment