
Hello, my friends! Let’s have a very honest conversation about pie.
We all love it. We all crave it. But what’s the one part that makes even experienced bakers want to tear their hair out?
The crust.
We’ve all been there, right? You fight with cold butter, the dough sticks to the counter, it tears, it shrinks in the pan. Or worse, you do everything right, and you still end up with that pale, dreaded, “soggy bottom.”
It’s a whole lot of work for something that is, let’s face it, just the container for the good stuff.
What if I told you the best container wasn’t a fussy, floury pastry at all? What if the perfect partner for that creamy, spiced pumpkin filling was a buttery, crunchy, sweet-and-salty graham cracker crust?
This, my friends, isn’t just a shortcut. It’s an upgrade. This is the pie that will save your sanity and become your new, non-negotiable holiday tradition.
The Magic of This Pumpkin Pie Recipe with Graham Cracker Crust
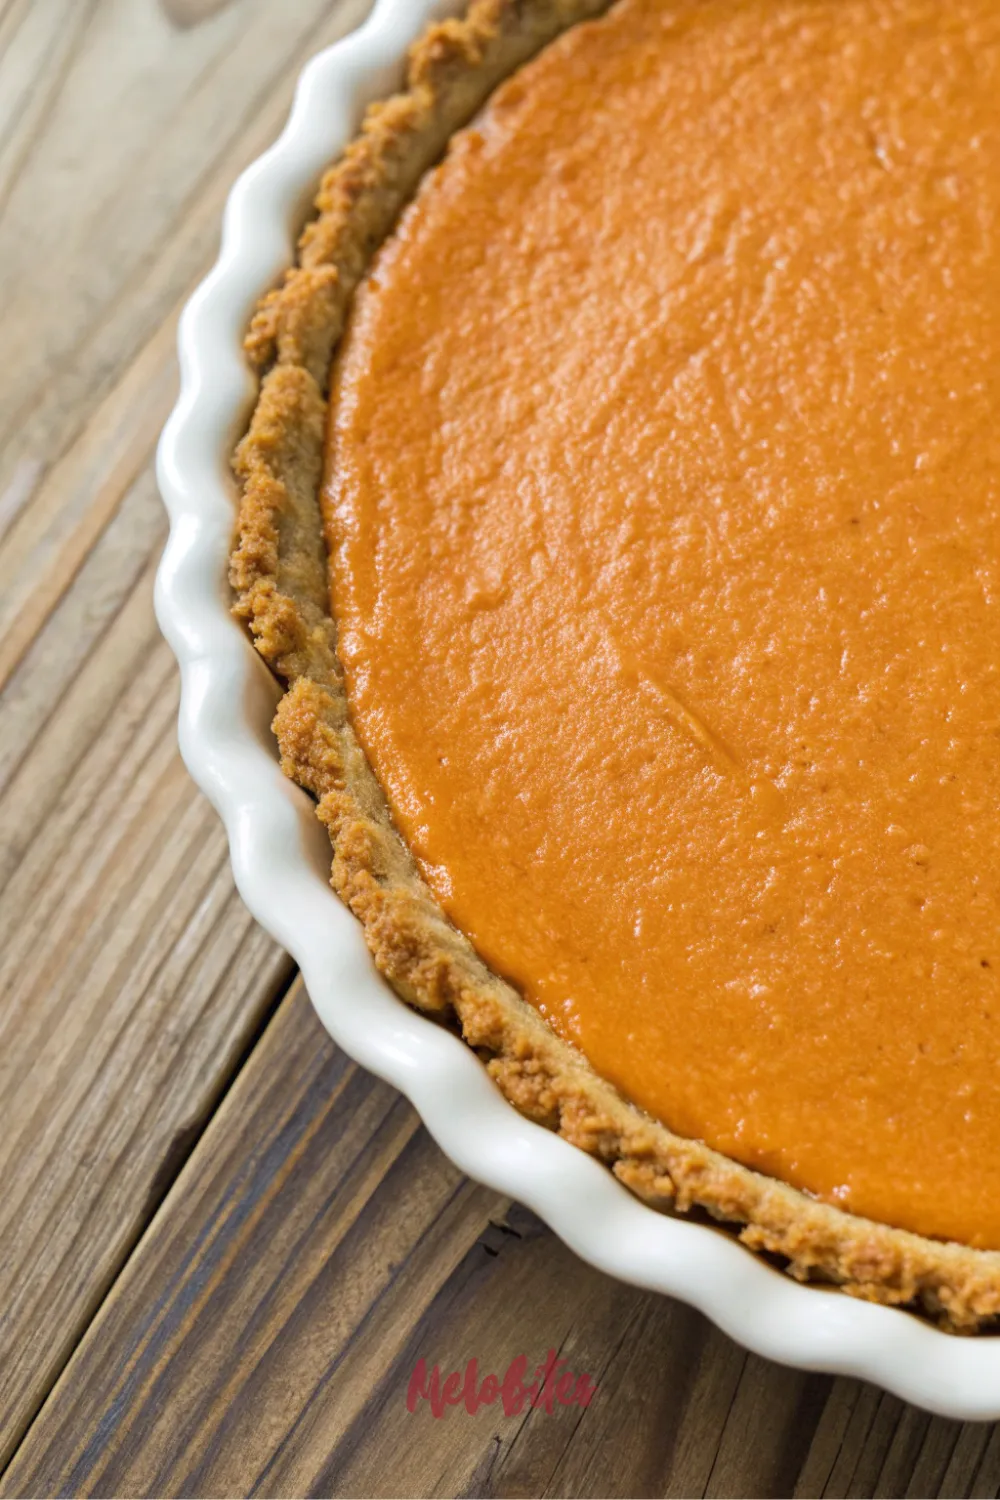
This is the pumpkin pie recipe with graham cracker crust that will change your mind about what a pumpkin pie should be. It’s all about the glorious, beautiful contrast.
You have the silky, smooth, and delicate pumpkin custard, which is all about those warm, comforting spices.
Then, you have this crisp, sandy, buttery crust that shatters just a little when you bite into it. It’s the perfect textural and flavor complement. The sweet, honey-kissed graham cracker flavor is the perfect partner for the earthy, spicy pumpkin.
Your New Go-To Easy Pumpkin Pie Recipe for Fall Baking
Let’s be real: the holiday season is stressful. Your oven is a high-stakes, high-traffic warzone. You’ve got a turkey roasting, casseroles to bake, and a house full of people.
You simply do not have time to be on your knees, praying to the “pie crust gods.”
This is, hands down, the easy pumpkin pie recipe that your fall baking repertoire needs. The crust is a 5-minute, one-bowl, “press-in-the-pan” affair. You can’t mess it up.
It’s the perfect, low-stress, high-reward dessert for any Thanksgiving or holiday gathering. It’s a guaranteed win when you just can’t deal with another complicated dish.
How to Make a Homemade Pumpkin Pie with Graham Cracker Crust
Now, I know what you’re thinking. “Can’t I just buy that sad, pre-made crust in the foil pan?”
You could, but we’re not doing that. A homemade pumpkin pie with graham cracker crust is a 5-minute task that is a million miles better than the store-bought version.
When you make it yourself, you’re using real, melted butter, not strange oils. You’re adding a pinch of salt and maybe some cinnamon to make it pop. It’s the difference between a stale cookie and a fresh-baked one.
Why You’ll Be Obsessed with This Pie
I am not kidding when I say this recipe will change your holiday baking game forever. It’s a total upgrade.
It is 100% FOOLPROOF I cannot say this enough. There is no dough to chill, no rolling, no crimping, no shrinking. If you can mix things in a bowl and pat them into a pan, you can make this crust.
The Texture is Everything This pie is a masterclass in texture. You get the crunch from the crust and the pure, silky velvet from the filling. It’s a perfect pairing.
It’s SO Much Faster A traditional crust can take hours with all the chilling. This crust is ready to be filled in about 15 minutes, from start to finish.
The Flavor is Better I’m just going to say it: I think this crust tastes better with pumpkin pie. The traditional, bland, floury crust doesn’t add anything. This sweet, salty, buttery crust adds a whole new, delicious dimension.
It’s a Crowd-Pleaser Kids love it, and adults love it. It’s familiar, it’s comforting, and it’s a guaranteed hit at any potluck or holiday dinner.
Nutritional Benefits
Okay, let’s be 100% real with each other. We are making a pie. This is a glorious, decadent, celebratory dessert!
But the wonderful thing about making homemade pie is that you are in complete control. You’re using simple, real, whole-food ingredients.
The star of the show, pumpkin, is a true superfood. It’s absolutely packed with Vitamin A (which is fantastic for your eyes) and is loaded with fiber. The eggs also add a nice boost of protein.
And, because this is a pie, you’re still getting those wholesome ingredients in every single slice. It’s a treat you can feel genuinely good about serving.
Full Recipe: The Ultimate Pumpkin Pie with Graham Cracker Crust
Prep Time: 20 minutes | Cook Time: 55-60 minutes | Chilling Time: 4 hours | Total Time: 5 hours 15 minutes | Yield: 1 (9-inch) pie, 8 slices | Category: Dessert | Method: Baking | Cuisine: American | Diet: N/A
Essential Ingredients for This Pumpkin Pie Recipe
For the Homemade Graham Cracker Crust:
- 1 1/2 cups graham cracker crumbs (about 10-12 full cracker sheets)
- 1/4 cup granulated sugar
- 1/2 teaspoon ground cinnamon
- 1/2 teaspoon kosher salt
- 7 tablespoons unsalted butter, melted
For the Classic Creamy Pumpkin Filling:
- 1 can (15 ounces) 100% Pure Pumpkin (NOT pumpkin pie filling)
- 3/4 cup granulated sugar
- 1 1/2 teaspoons ground cinnamon
- 1/2 teaspoon ground ginger
- 1/2 teaspoon ground nutmeg
- 1/4 teaspoon ground allspice (or cloves)
- 1/2 teaspoon kosher salt
- 2 large eggs
- 1 can (12 fluid ounces) Evaporated Milk
- 1 teaspoon vanilla extract
Ingredients Notes
- Graham Cracker Crumbs: You can buy the pre-made crumbs, but it’s so much better to make your own. Just toss 10-12 full sheets into a food processor or a zip-top bag with a rolling pin.
- Pumpkin Puree: This is the most critical part of the filling. You must buy the can that says 100% Pure Pumpkin (like Libby’s). Do NOT buy “Pumpkin Pie Filling,” which is pre-sweetened and spiced.
- Evaporated Milk: This is the classic. Do not substitute it with Sweetened Condensed Milk (a totally different, sugary product) or regular milk (which is too thin). Evaporated milk has a slightly “cooked” flavor that is essential to the nostalgic taste.
- The Spices: The blend of cinnamon, ginger, nutmeg, and allspice is what gives the pie its signature warm, spicy, perfect-for-fall flavor. You can also substitute 2 1/2 teaspoons of a pre-made “Pumpkin Pie Spice” blend.
- Unsalted Butter: This is for the crust. Using unsalted lets you control the final saltiness, which is key. That little pinch of salt in the crust makes it “pop.”
How to Make This Pumpkin Pie Recipe with Graham Cracker Crust
This recipe is in two main parts: the Crust and the Filling.
Part 1: Make and Par-Bake Your Graham Cracker Crust
- Prep Your Oven: First, preheat your oven to 375°F (190°C).
- Make the Crumbs: If you’re using whole crackers, pulse them in a food processor until they are fine, sandy crumbs.
- Mix the Crust: In a medium bowl, combine the 1 1/2 cups of graham cracker crumbs, 1/4 cup sugar, 1/2 teaspoon cinnamon, and 1/2 teaspoon salt.
- Add the Butter: Pour in the 7 tablespoons of melted butter. Stir with a fork until all the crumbs are evenly moistened. The mixture should look like damp sand.
- Press the Crust: Dump these crumbs into a 9-inch pie plate. Use your fingers and the flat bottom of a measuring cup to press the crumbs firmly and evenly into the bottom and all the way up the sides of the dish.
- The Par-Bake (CRITICAL): This is the secret to a crisp, not-soggy, crust. Bake the empty crust for 10 minutes.
- Cool Slightly: Set the hot, par-baked crust aside on a wire rack to cool slightly while you make the filling. Reduce the oven temperature to 350°F (175°C).
Part 2: Make the Filling and Bake the Pie
- The Easiest Part: In a large bowl, whisk together the 3/4 cup of granulated sugar, all the spices (cinnamon, ginger, nutmeg, allspice), and the 1/2 tsp salt.
- Mix Dry First: Mixing the spices with the sugar first is a pro-trick. It guarantees they get perfectly distributed and you don’t get a random pocket of cloves.
- Add Wet Ingredients: Add the 2 lightly beaten eggs and the can of 100% pure pumpkin. Whisk until it’s all combined.
- Add Milk and Vanilla: Slowly pour in the can of evaporated milk and the vanilla extract, whisking gently as you go. Keep whisking until the entire mixture is smooth, uniform in color, and silky.
- Fill and Bake: Place your par-baked crust (it can still be warm) on a baking sheet. Pour the filling into the crust.
- Bake the Pie: Bake at 350°F (175°C) for 50-60 minutes.
- The “Jiggle Test”: The pie is done when the edges are set and puffed. The very center (about a 2-3 inch circle) should still have a slight wobble. It should wobble like Jell-O, not slosh like water.
- Cool Completely (MANDATORY): This is the hardest part. You must let the pie cool on a wire rack at room temperature for at least 3-4 hours. Do not slice it warm! The custard needs this time to cool and set up into that perfect, sliceable texture.
Alternative Recipe: The No-Bake, “Chiffon” Pumpkin Cheesecake Pie
You’ve already mastered the easy crust, so what if you want an even easier pie? One that doesn’t even use the oven?
This no-bake version is a total lifesaver when your oven is full of turkey. It has a light, airy, mousse-like texture that is a beautiful contrast to the crisp graham cracker crust.
Alternative No-Bake Filling Ingredients:
- 1 package (8 ounces) full-fat cream cheese, softened to room temperature
- 1 can (15 ounces) 100% pure pumpkin puree
- 1/2 cup packed dark brown sugar
- 1/2 cup granulated sugar
- 1 1/2 teaspoons pumpkin pie spice
- 1/2 teaspoon kosher salt
- 1 1/2 cups cold heavy whipping cream
- 1 teaspoon vanilla extract
How to Make the No-Bake Version:
- Make the Crust: Follow steps 1-5 from the main recipe to make and press your graham cracker crust into the pie plate.
- CHILL the Crust: Instead of baking, place the unbaked crust in the freezer for at least 30 minutes (or in the fridge for 1 hour) to set up firmly.
- Make the Base: In a large bowl, use an electric hand mixer to beat the softened cream cheese until it’s completely smooth and free of lumps.
- Add Pumpkin and Sugar: Beat in the pumpkin puree, brown sugar, granulated sugar, pumpkin pie spice, and salt. Beat on medium speed until the mixture is completely smooth and fluffy.
- Whip the Cream: In a separate, chilled bowl, beat the cold heavy whipping cream and the vanilla extract on high speed. Beat until it forms stiff peaks (when you lift the beaters, the peak holds its shape).
- Fold and Combine: Gently fold the whipped cream into the pumpkin-cream cheese mixture using a spatula. Do this in two batches to keep the mixture light and airy.
- Fill and Chill: Spoon this light, airy mousse filling into your chilled graham cracker crust. Spread it into an even, beautiful layer.
- Chill Completely: Cover the pie loosely with plastic wrap. Refrigerate for at least 6 hours, or preferably overnight, until the filling is completely firm and set.
Storage Options
This is a custard pie, which means it must be stored in the refrigerator.
Once the pie has cooled completely (and I mean 100% to room temperature), cover it loosely with plastic wrap or aluminum foil. It will keep beautifully in the fridge for 3 to 4 days.
(I’m just going to say it: the flavor is even better on day two. The spices get to meld, and the custard gets even firmer. This is the perfect make-ahead pie).
This pie also freezes beautifully. You can freeze the whole pie or individual slices. Let it chill completely, then freeze it “naked” (uncovered) on a baking sheet until solid. Once solid, wrap it tightly in two layers of plastic wrap, then a layer of aluminum foil. It will keep for up to 2 months. To thaw, just unwrap it and place it in the refrigerator overnight.
Variations and Substitutions
This recipe is a fantastic, foolproof base. Here are a few ways to customize it.
- Crust Swap: This is the most fun part. Instead of graham crackers, use the same amount of gingersnap cookies for a spicy, fiery kick. Or, use Biscoff cookies for a caramelized, cinnamon-sugar flavor.
- Make it Dairy-Free: This is an easy swap! Use Sweetened Condensed Coconut Milk instead of the evaporated milk and sugar. Use 7 tablespoons of melted coconut oil or a high-quality vegan butter stick in the crust.
- Make it Gluten-Free: Even easier. Just buy high-quality, gluten-free graham crackers. The filling is already naturally gluten-free.
- Make it Boozy: Add 2 tablespoons of high-quality bourbon or dark rum to the filling when you add the vanilla. It adds an incredible, warm, complex flavor for an “adults-only” pie.
- Make it “Black Bottom”: Before you pour in the pumpkin filling, pour a thin layer of melted (and cooled) dark chocolate ganache over your par-baked crust. Let it set for 10 minutes. Then add the pumpkin. It’s a secret, delicious surprise.
Practical & Valuable Tips
Tip 1: The Par-Bake is NOT Optional. I’m saying this a final time. It is the #1 most important tip for a perfect pie. If you pour a wet filling into a raw crust, the butter in the crust will melt, the filling will soak in, and the bottom will be a pale, soggy, uncooked disaster. You must bake that crust first!
Tip 2: Use a Measuring Cup for the Crust. This is the “pro” trick. After you dump the crumbs in, use your fingers to get them up the sides. Then, take a flat-bottomed measuring cup (or a small glass) and use it to press the crumbs firmly into the bottom and against the sides. This creates a super-compact, even, and sturdy crust that won’t fall apart.
Tip 3: The “Jiggle Test” is Key. The biggest mistake is over-baking. A custard pie continues to cook from residual heat. You want to take it out when the center still has a slight wobble (like Jell-O). If it’s rock-solid, it’s overdone, and the texture will be rubbery and it will crack.
Tip 4: The Slow Cool is the Secret to No Cracks. A crack in a pumpkin pie is caused by a sudden temperature change. Don’t take your hot pie and stick it right in the cold fridge. Let it cool completely at room temperature, on a wire rack, for at least 3-4 hours. This gentle, slow cool-down is the key to a flawless, smooth top.
Frequently Asked Questions
- Why did my pie crack? This is the most common pie problem! It’s almost always one of two things: you over-baked it (see Tip #3) or you cooled it too quickly (see Tip #4). Don’t worry, it still tastes amazing! Just cover it with a generous mountain of whipped cream, and no one will ever know.
- Can I use a store-bought, pre-made graham cracker crust? You can, but it’s a huge flavor downgrade. Those foil-pan crusts are often made with oils instead of butter, and they taste stale and sandy. A homemade one is 5 minutes of work and tastes 100 times better.
- Why is my graham cracker crust soggy? You didn’t par-bake it, or you didn’t par-bake it for long enough. That crust needs that 10-minute solo bake to get crisp and form a “seal” against the wet filling.
- Can I use fresh pumpkin puree instead of canned? You can, but it’s a lot of work and can be watery. You must use a “sugar pie” pumpkin (not a carving one). Roast it, puree it, and then strain the puree in a cheesecloth-lined sieve for at least an hour to drain all the excess water.
- Can I make this pie ahead of time? You must! This pie needs, at a minimum, 4-6 hours of chill time to set up for clean slices. It is the perfect dessert to make the day before Thanksgiving, which frees up your oven and your time.
So there you have it. This is the Pumpkin Pie Recipe with Graham Cracker Crust that will change your holiday.
It’s the perfect, stress-free, and delicious shortcut that tastes like a gourmet upgrade.
If you’re ready to ditch the dough-drama and make the most beloved pie on the table, this is your recipe. Be sure to save this post and pin it to your “Holiday Baking” or “Easy Desserts” board on Pinterest. You’re going to want to find this one, year after year! Happy baking!


Leave a Comment